[BNTgirl Collab] 4MINUTE – Cold Rain (Gayoon) Make Up Tutorial

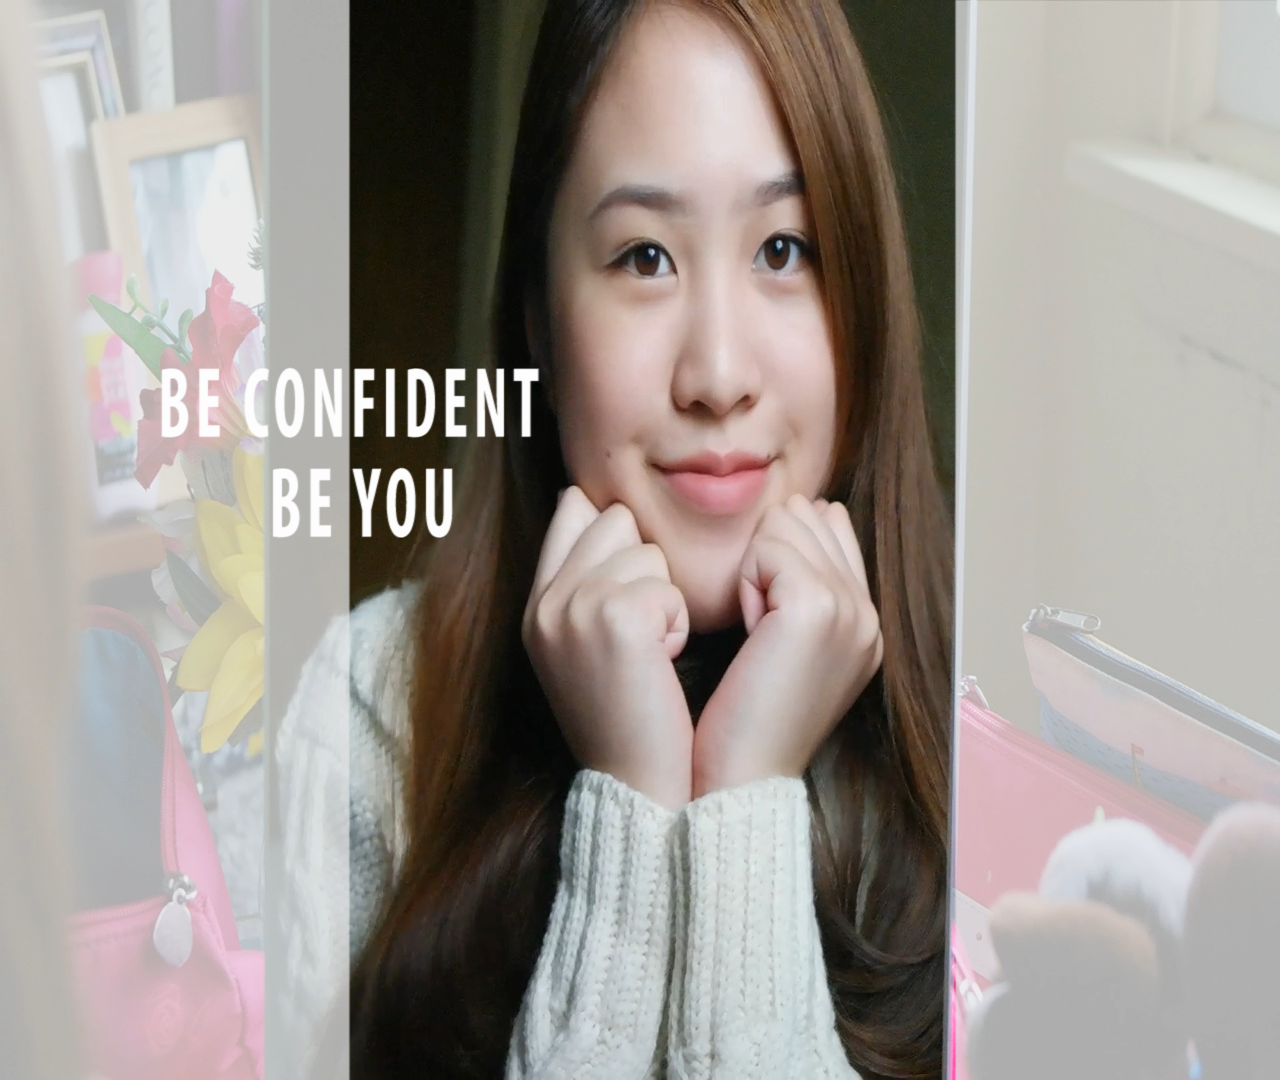
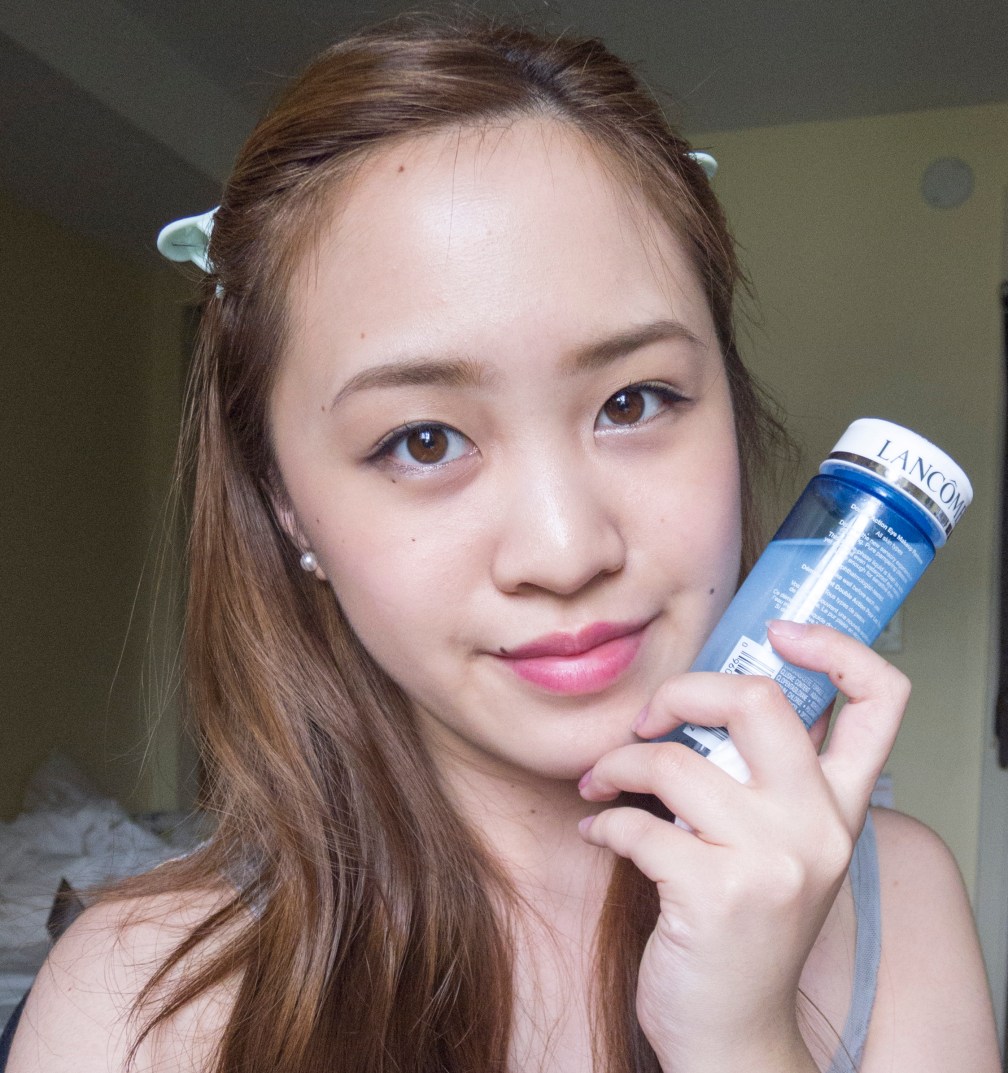
Good morning guys (10:25am here).

Today I’ll be doing a make up tutorial wooooo!

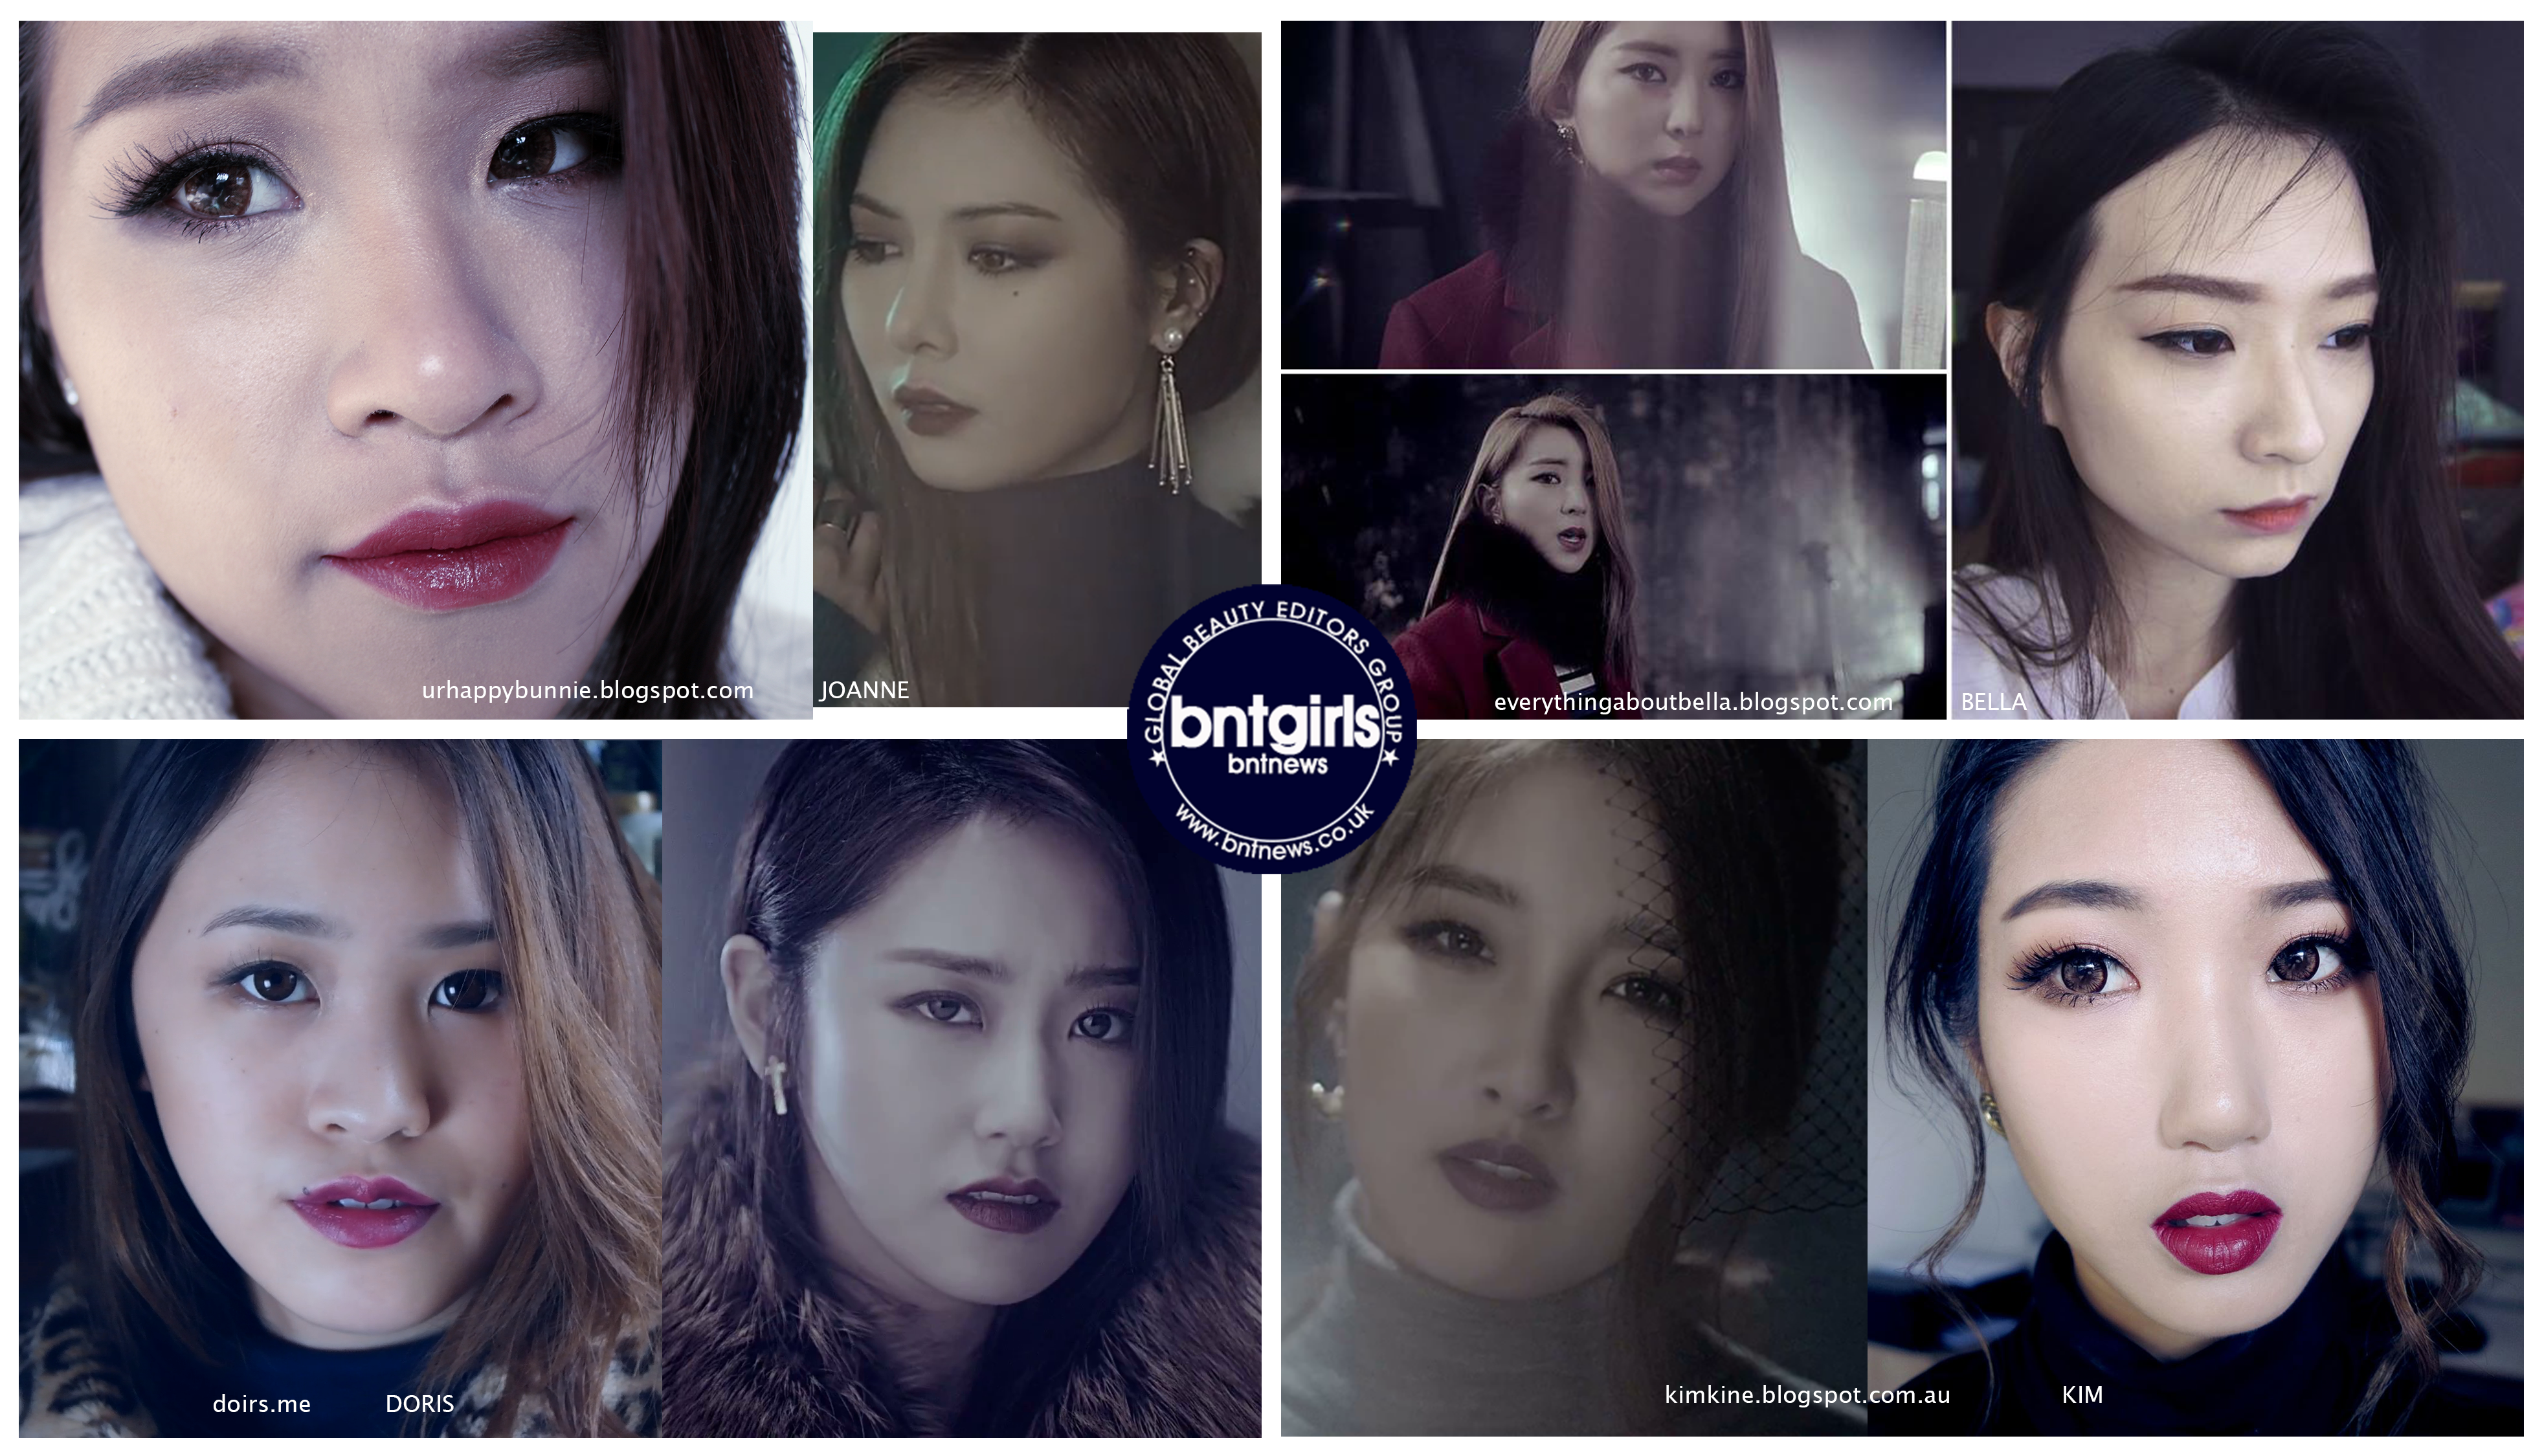
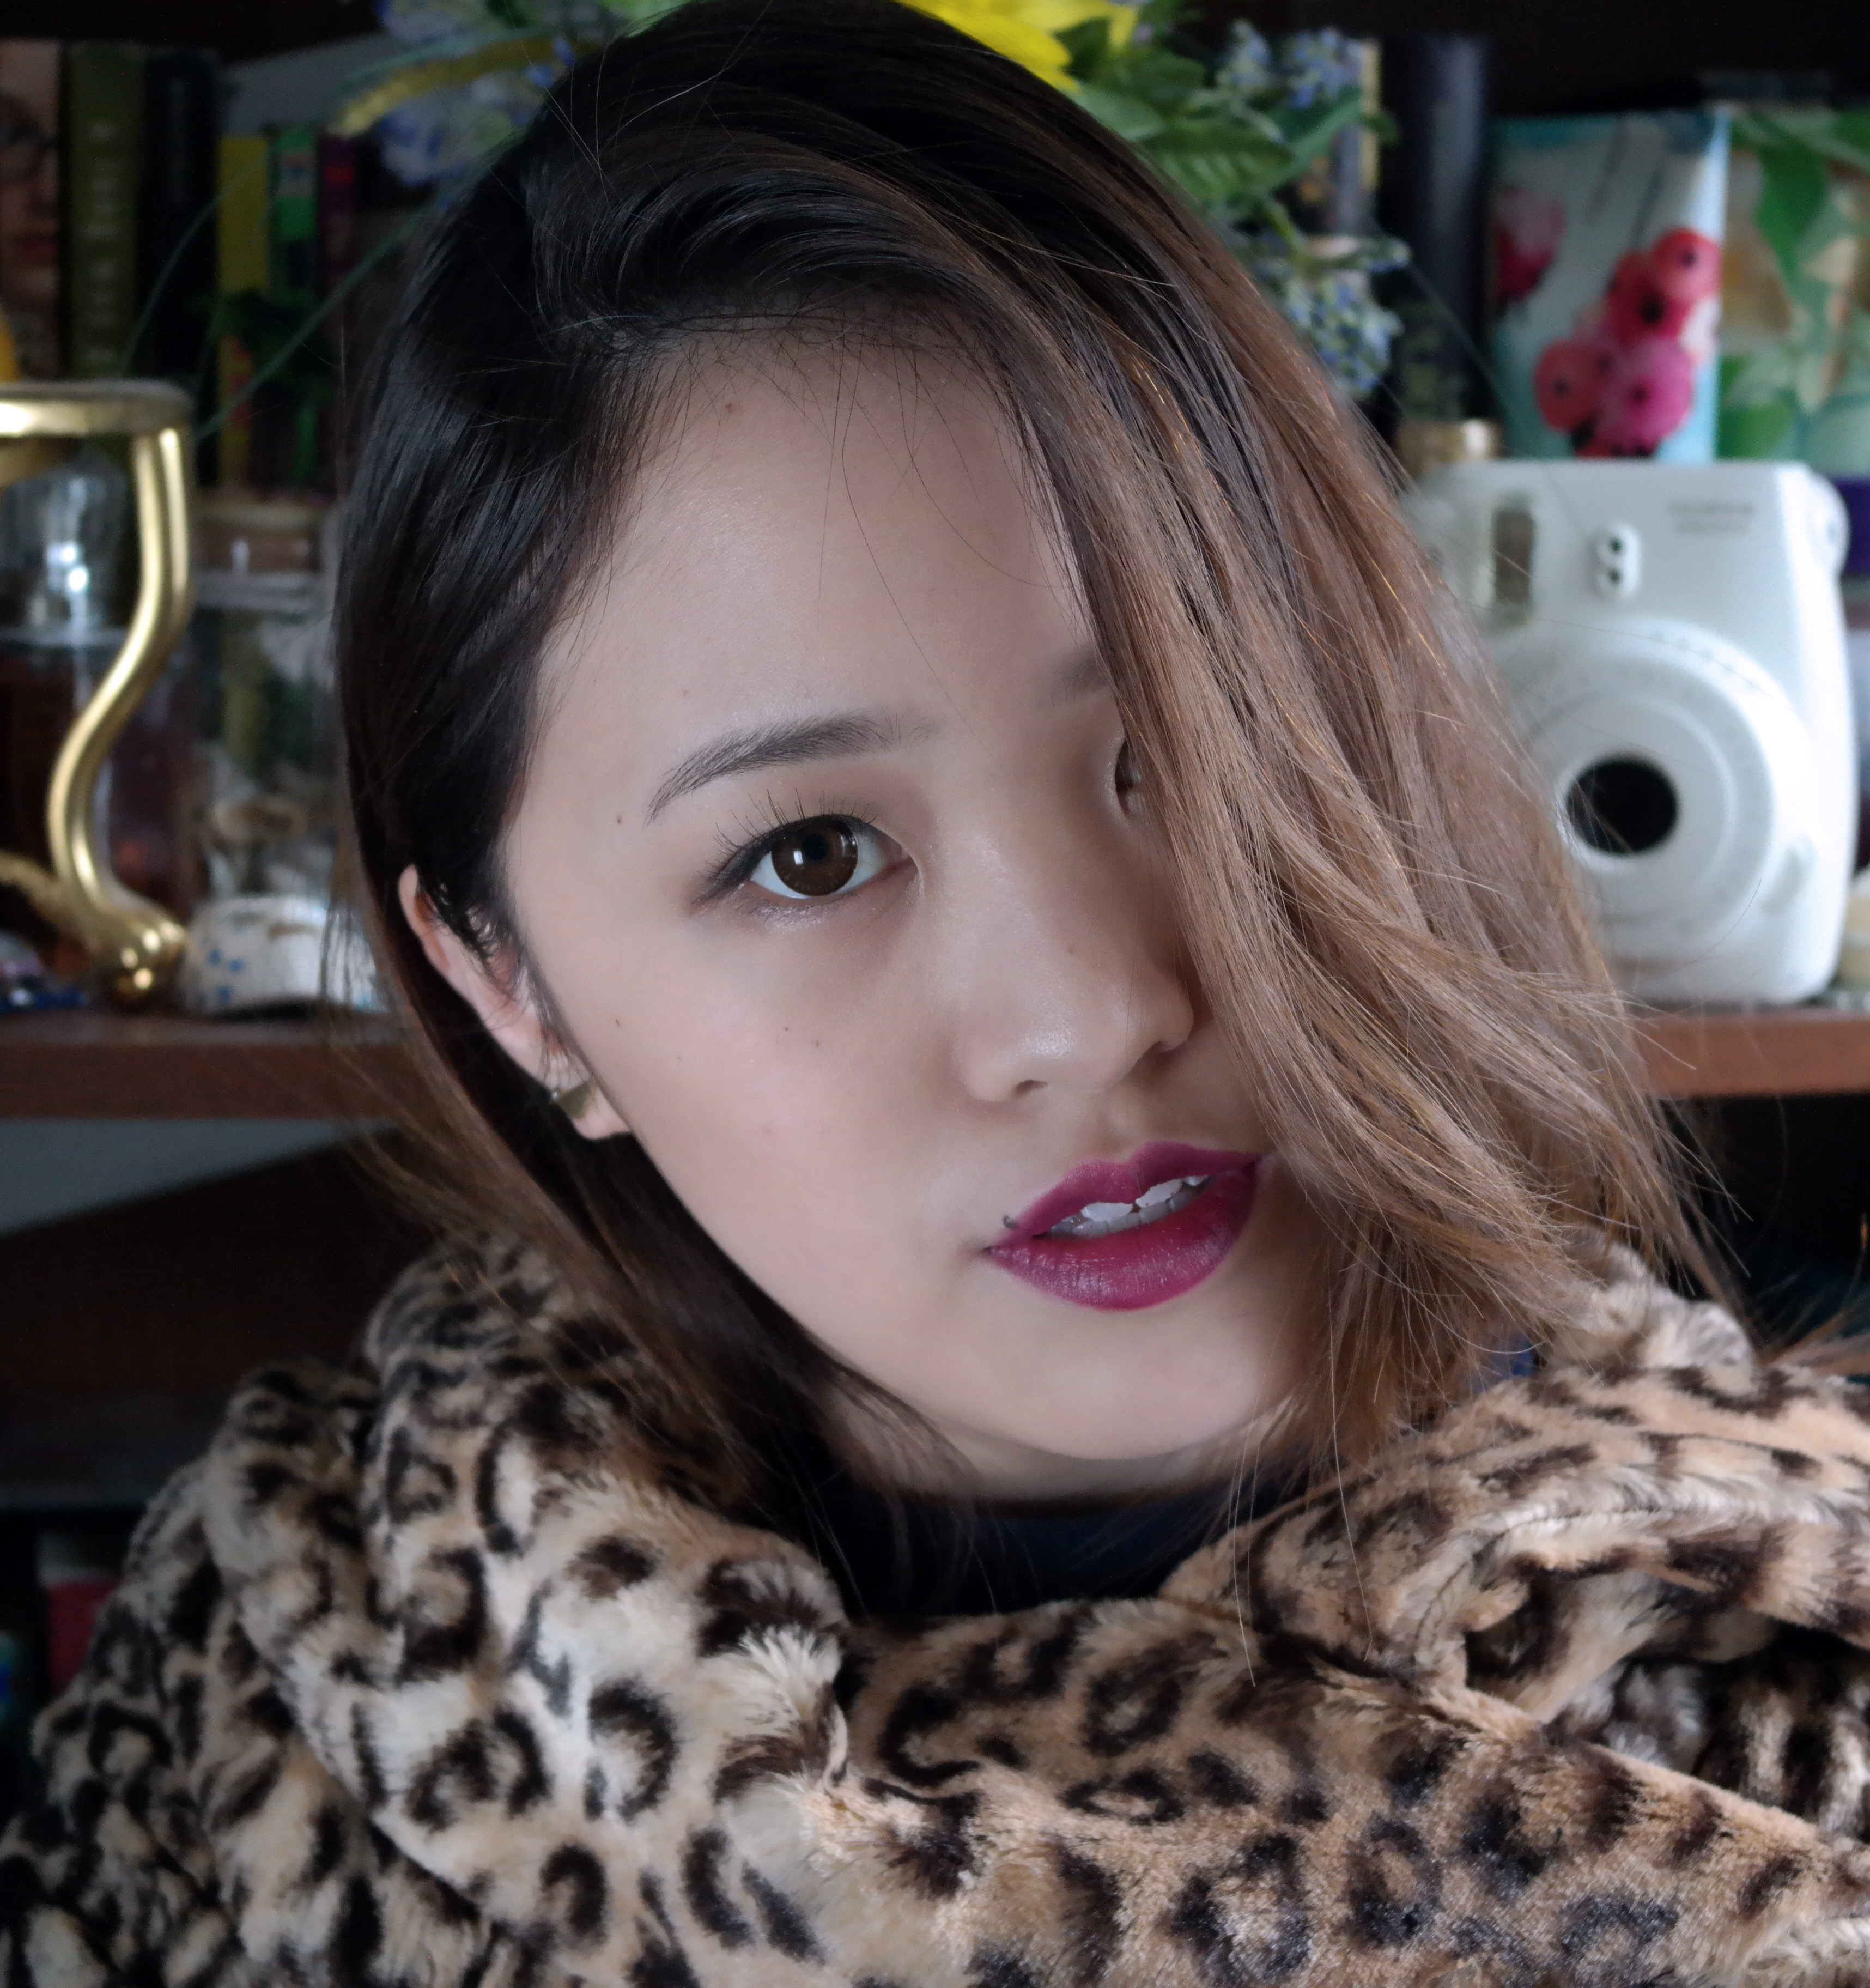
Inspired by 4MINUTE’s Cold Rain mv, the BNTgirls decided to each do a make up look based off of a group member in the MV. I got Ga-yoon, dark lips on point.

Check out the other BNTgirls’s links;

Joanne’s Hyuna, Kim’s Jihyun and Bella’s So Hyun.

bntgirlscollage

So let me take you guys on a winter wonderland, err, I mean show you how I did this (see picture below or video).

cover

Alright let’s do this.

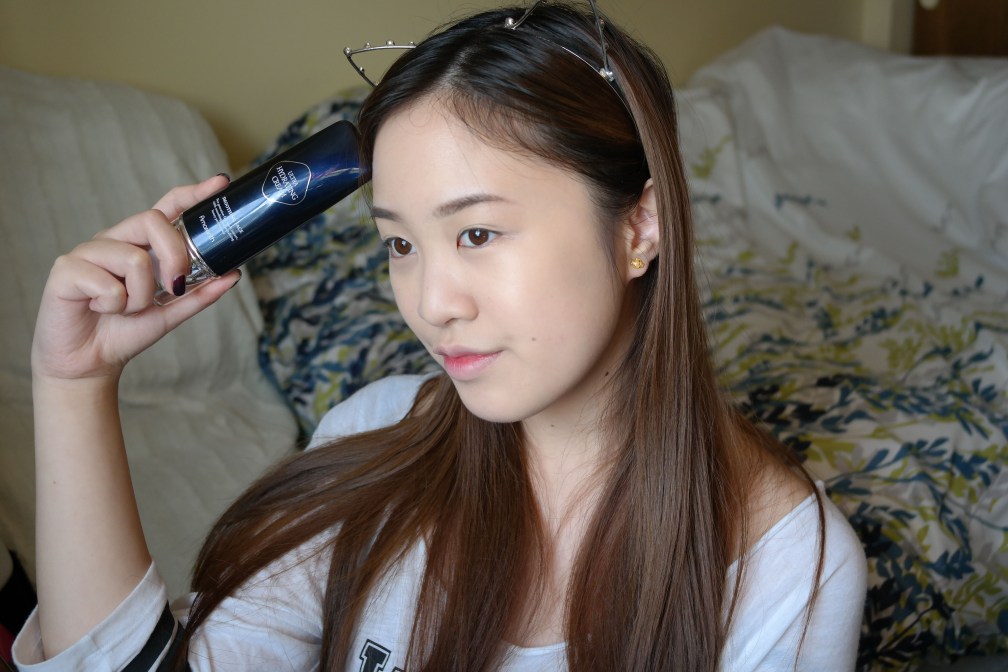
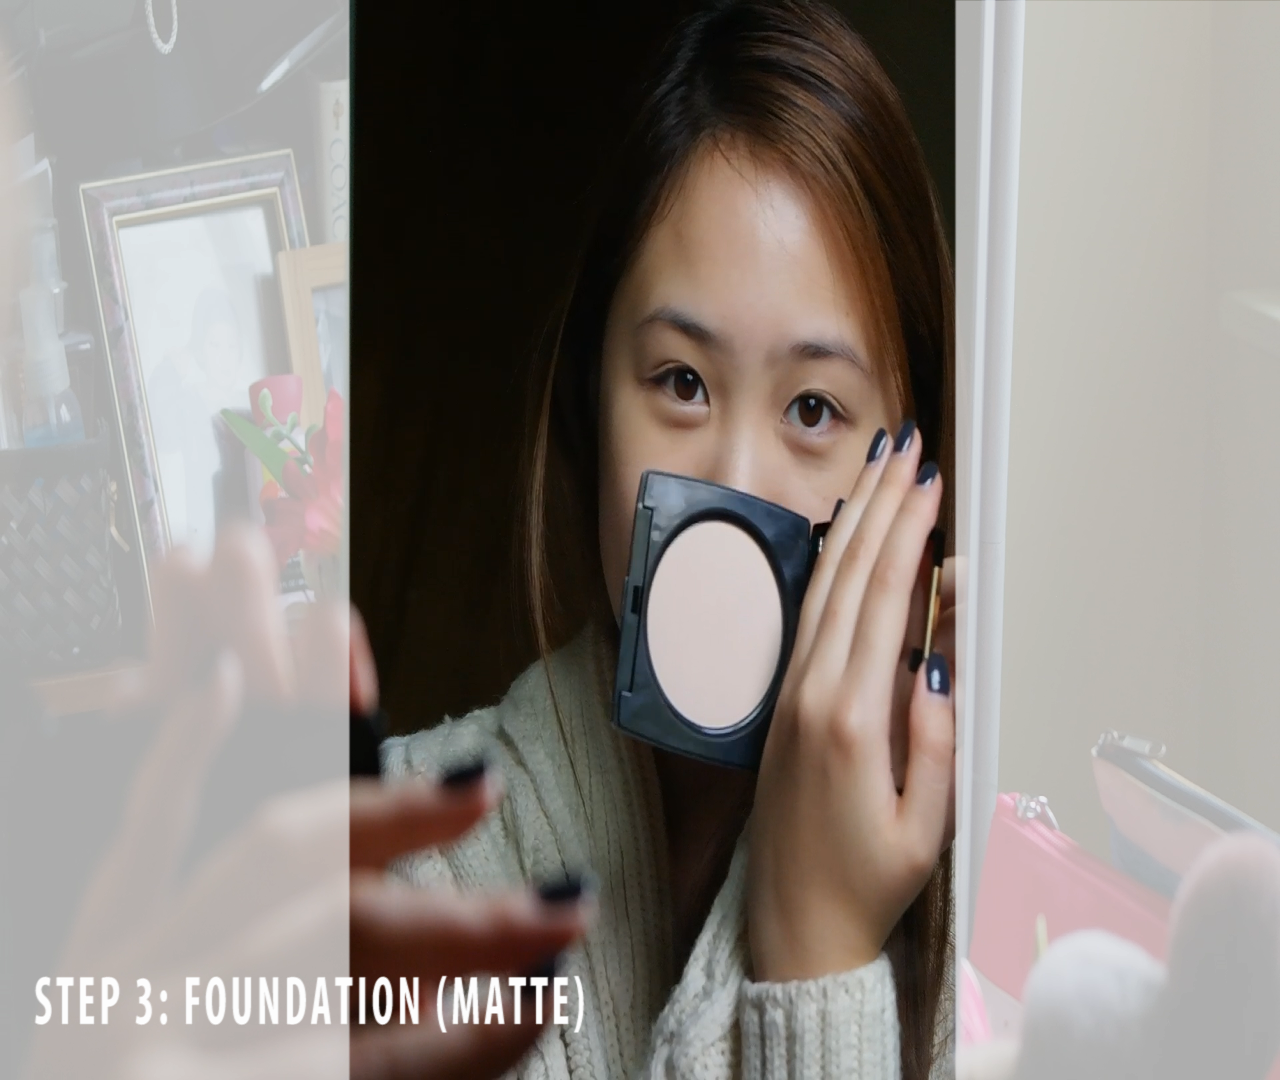
Using the Wayne Goss method for dewy skin, powder then foundation, I used;

LANCOME – LA BASE PRO (primer)
LANCOME – DUAL FINISH MATTE PORCELAINE 1 (powder)
LANCOME – PHOTOGENIC LUMENESSENCE BUFF6W (foundation)

I applied the foundation using my beauty blender for a more even natural finish.

4minute cold rain.Still010

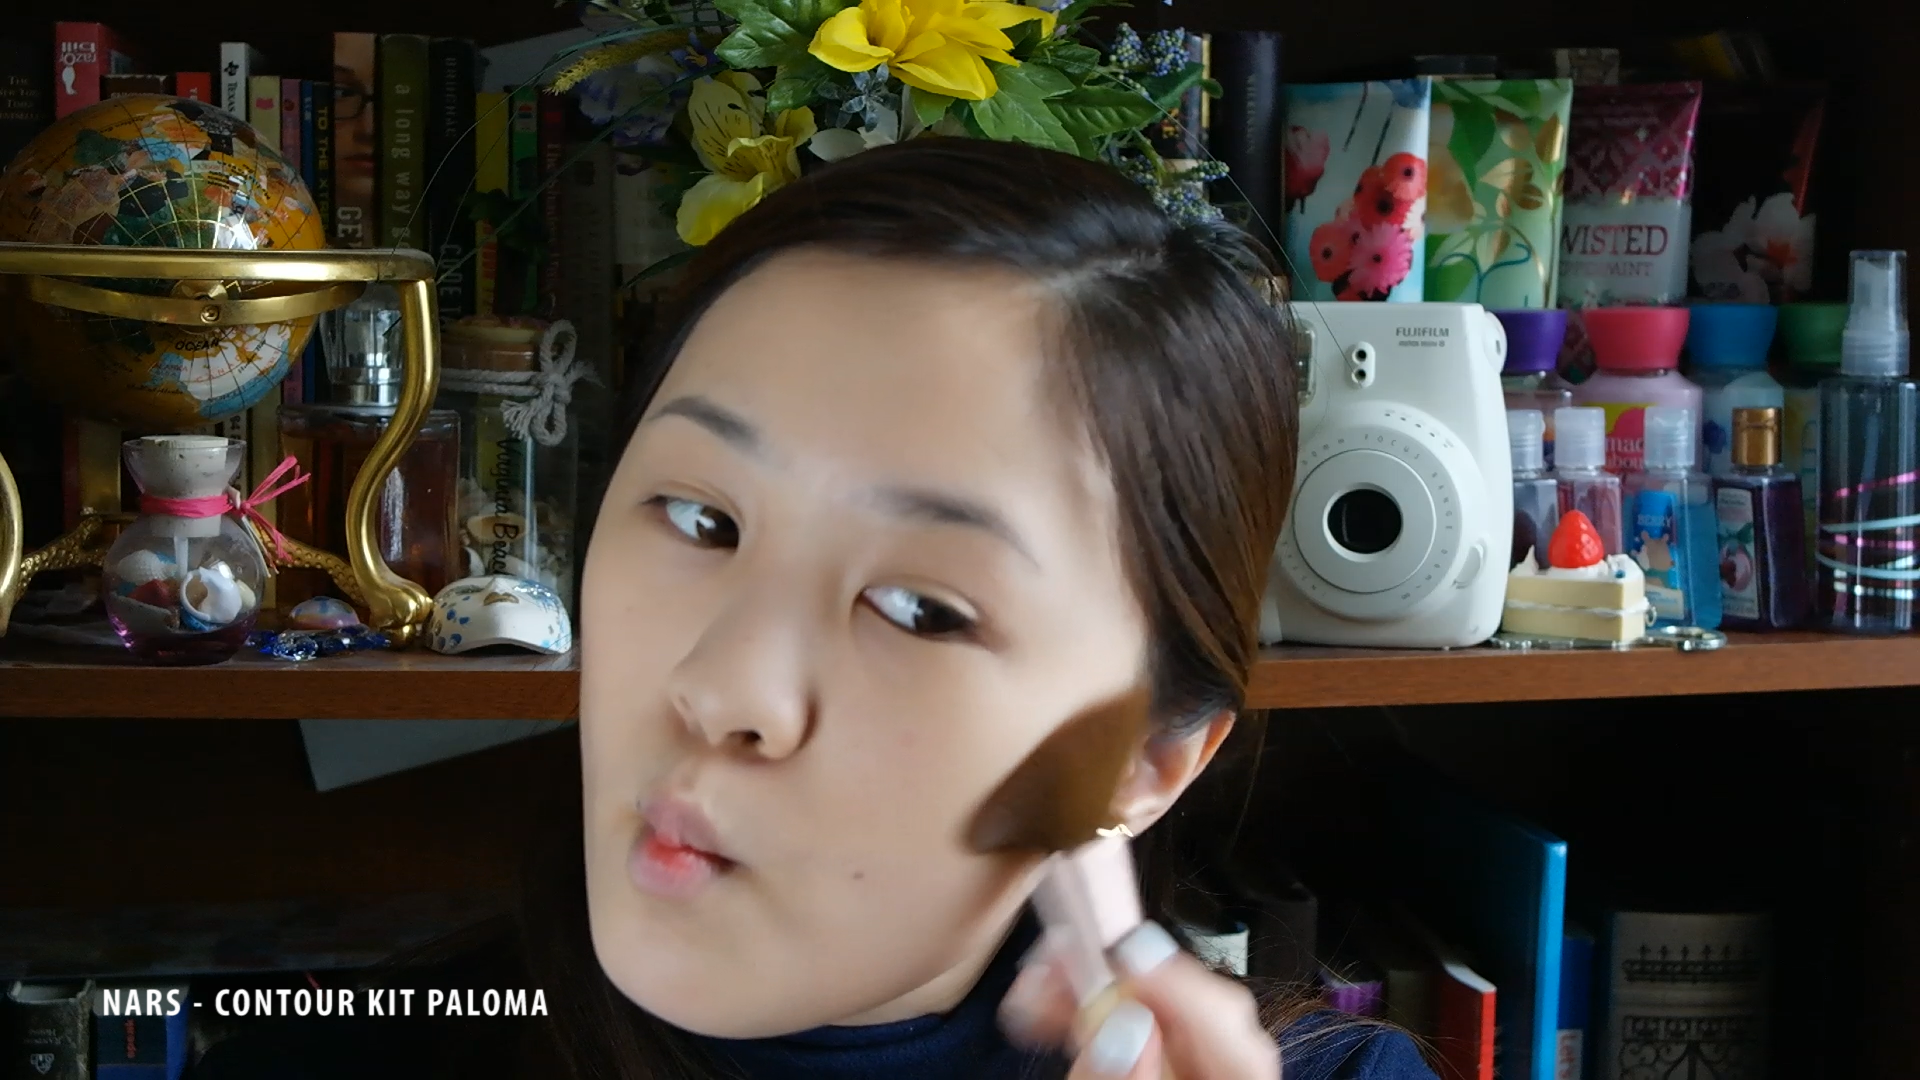
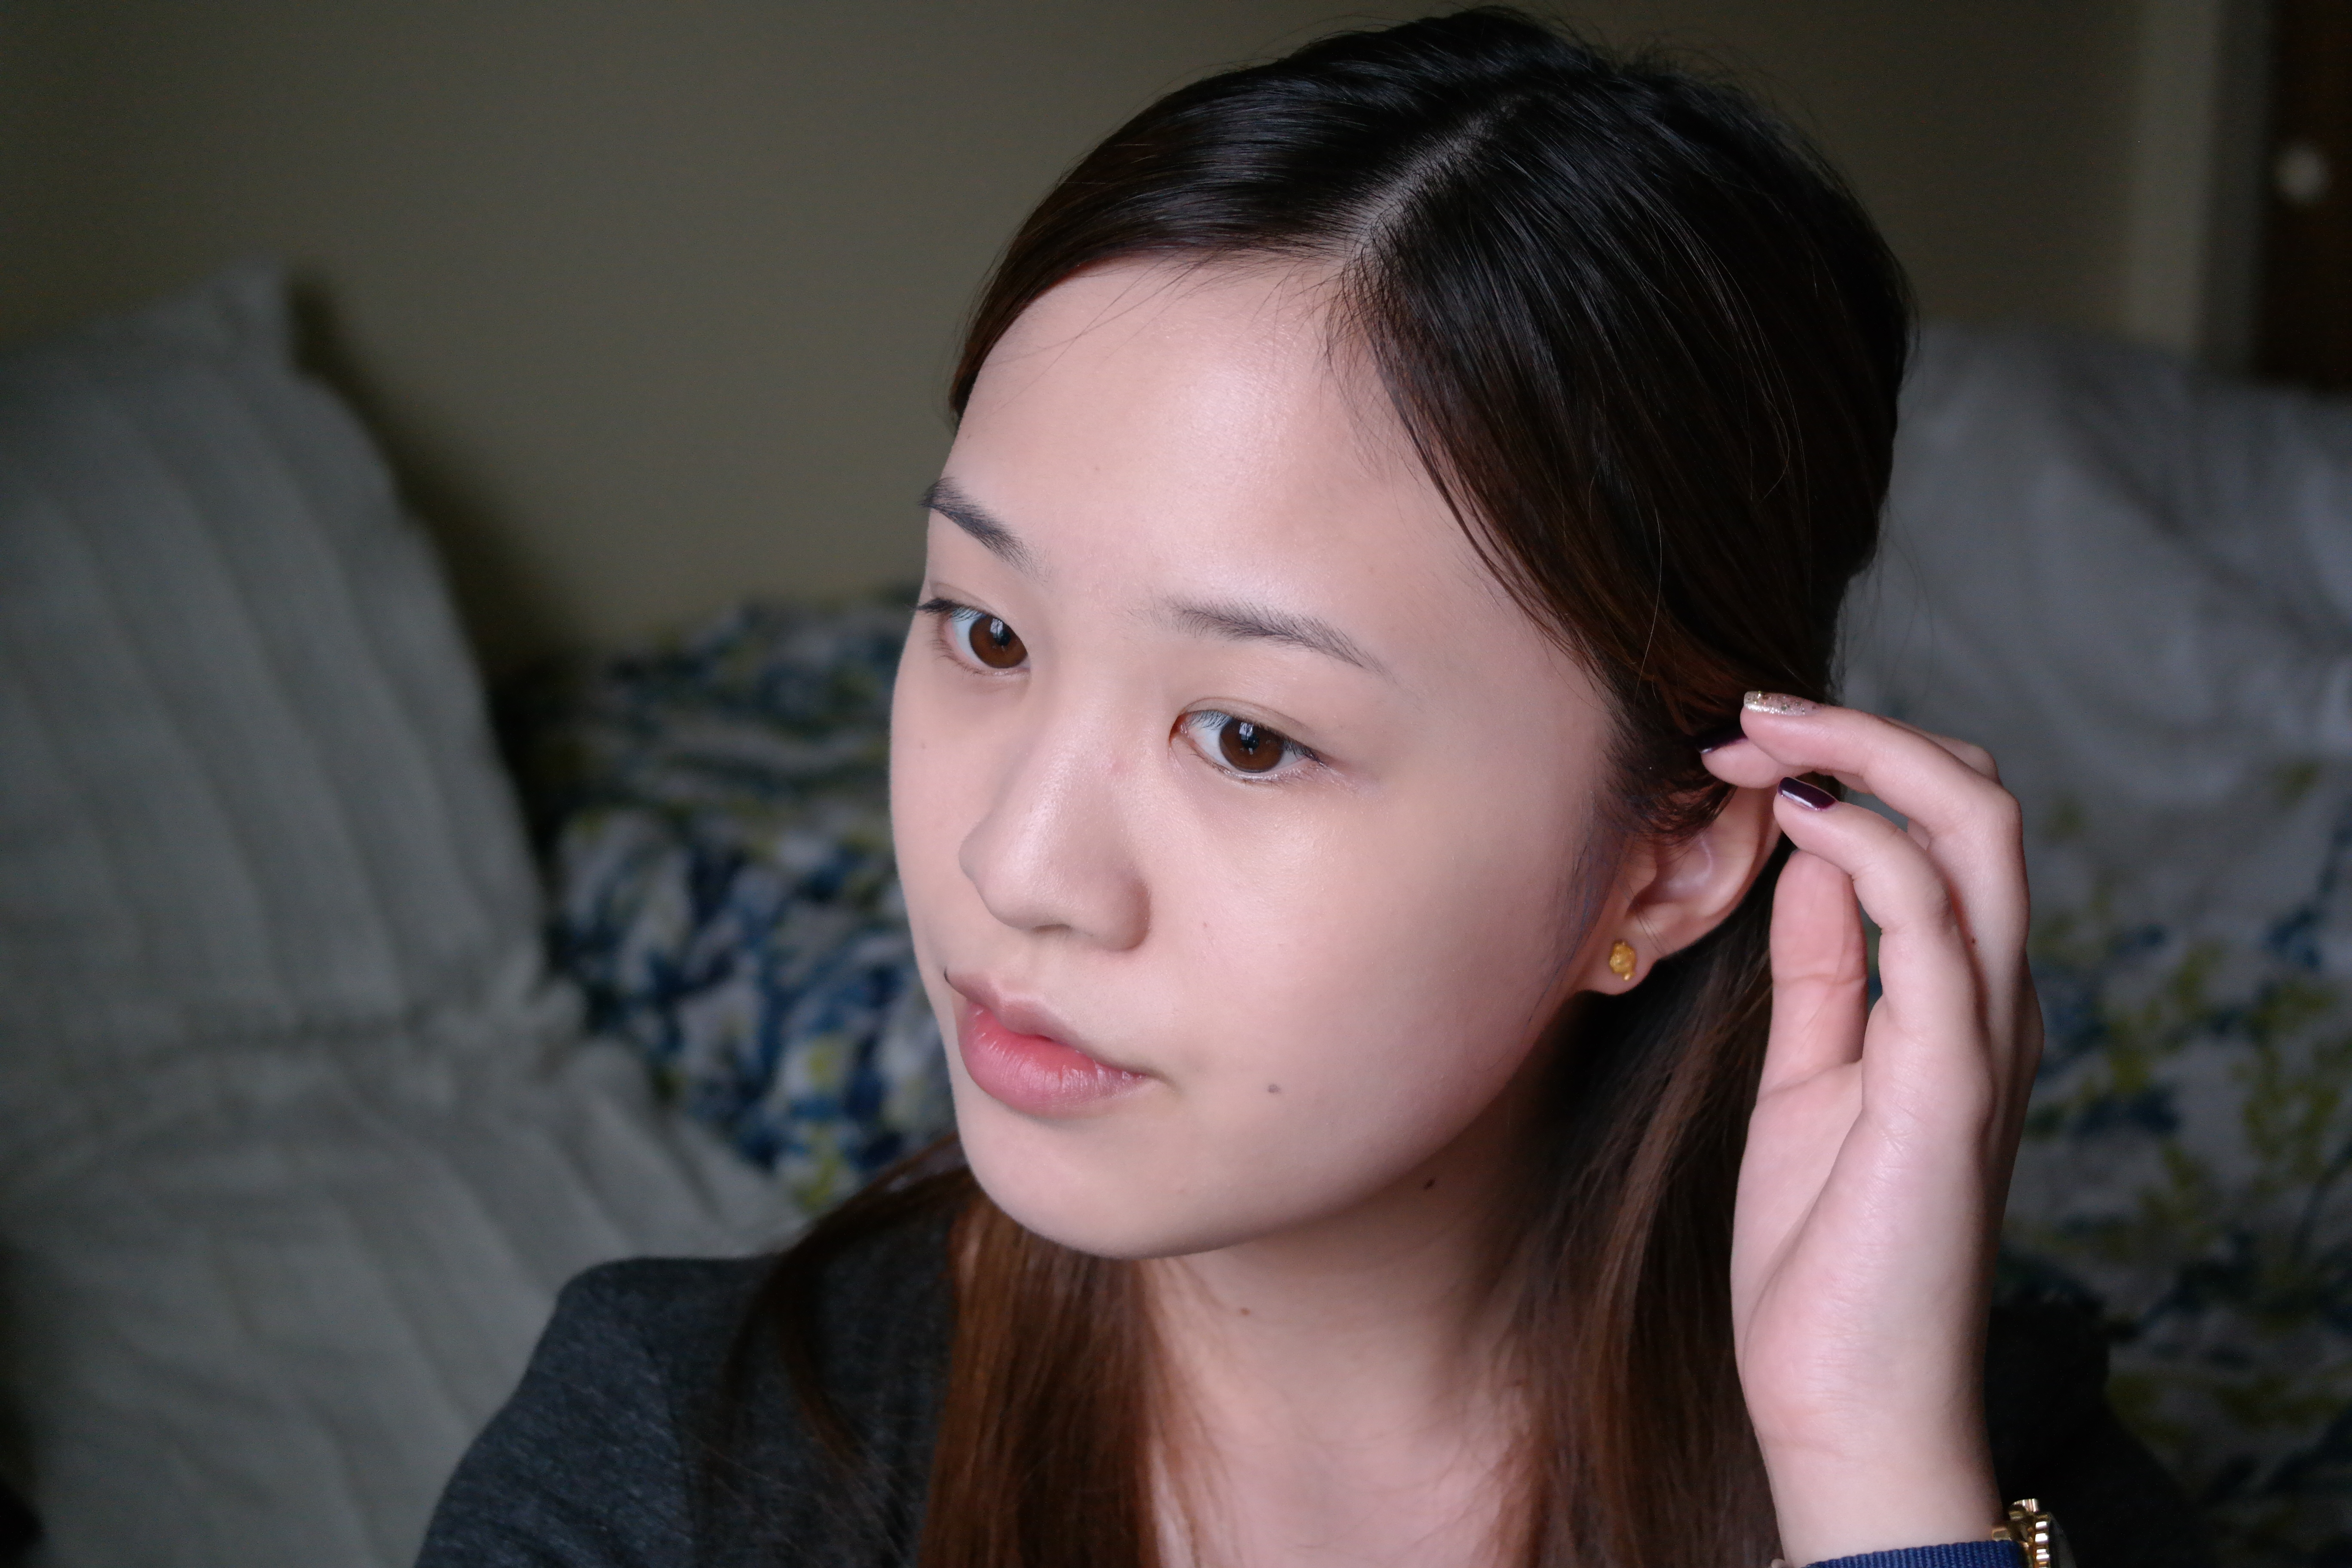
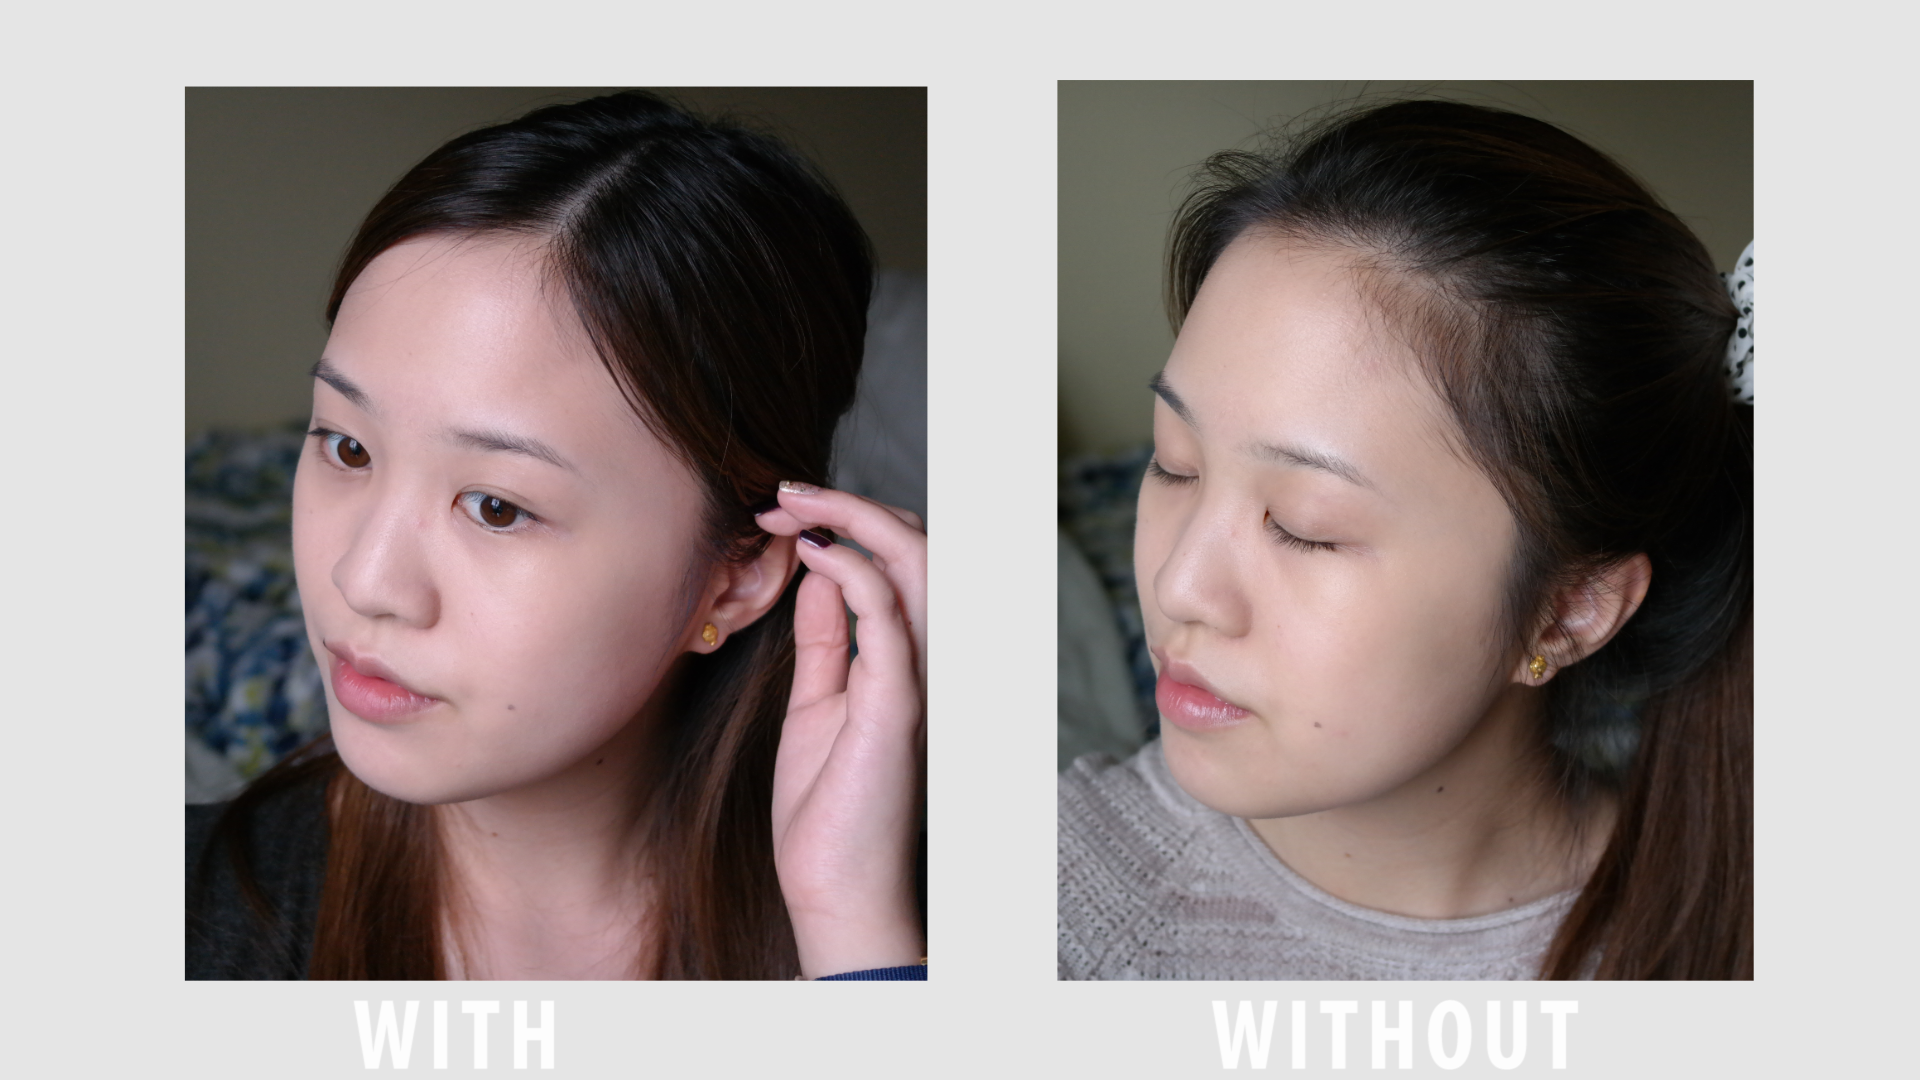
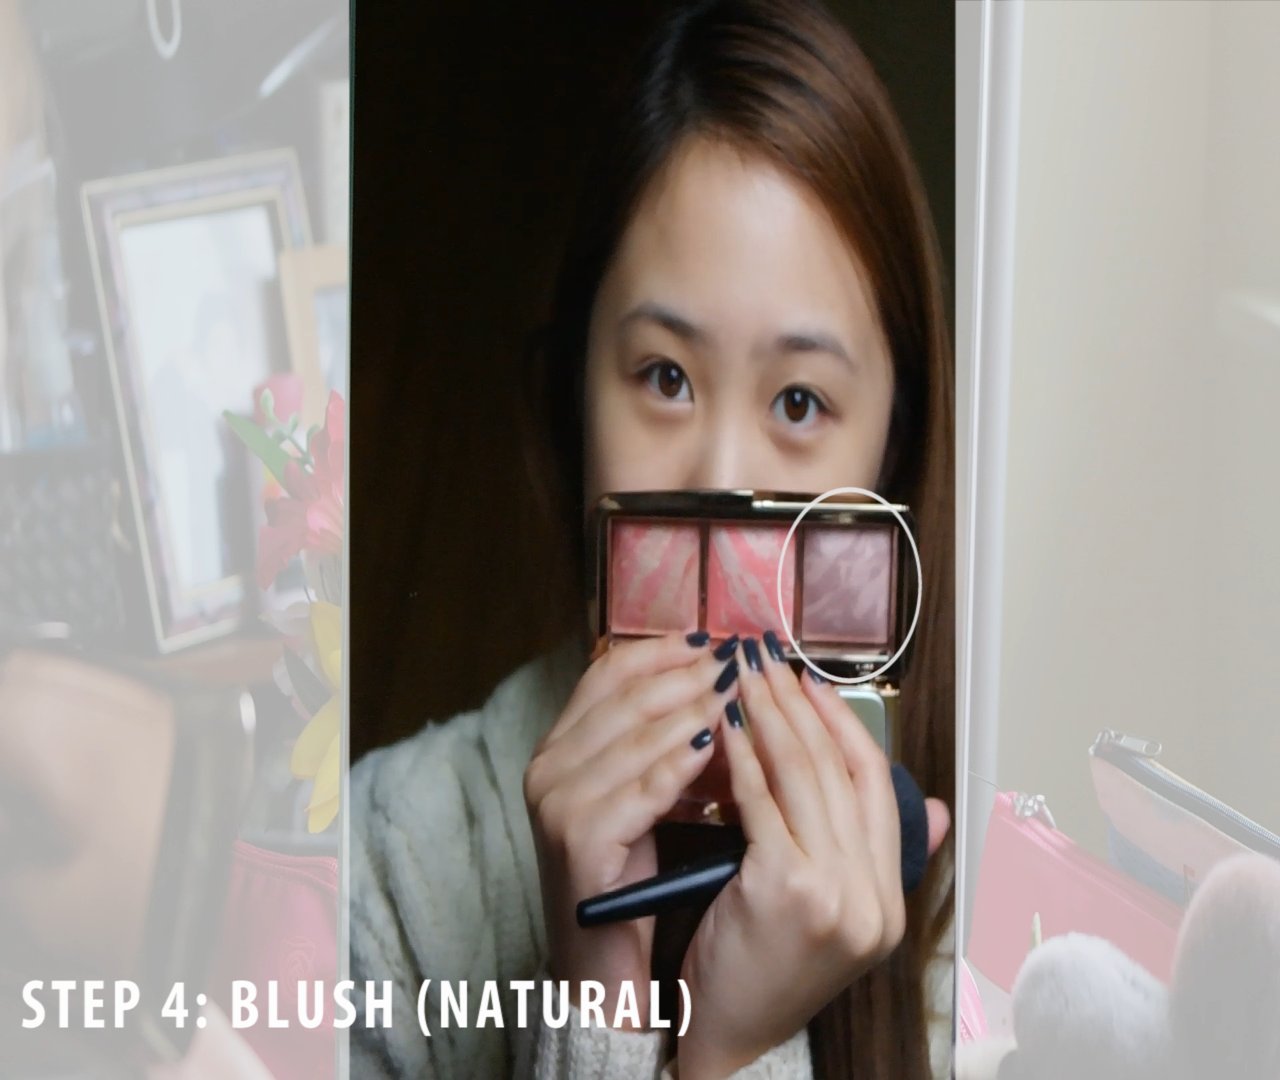
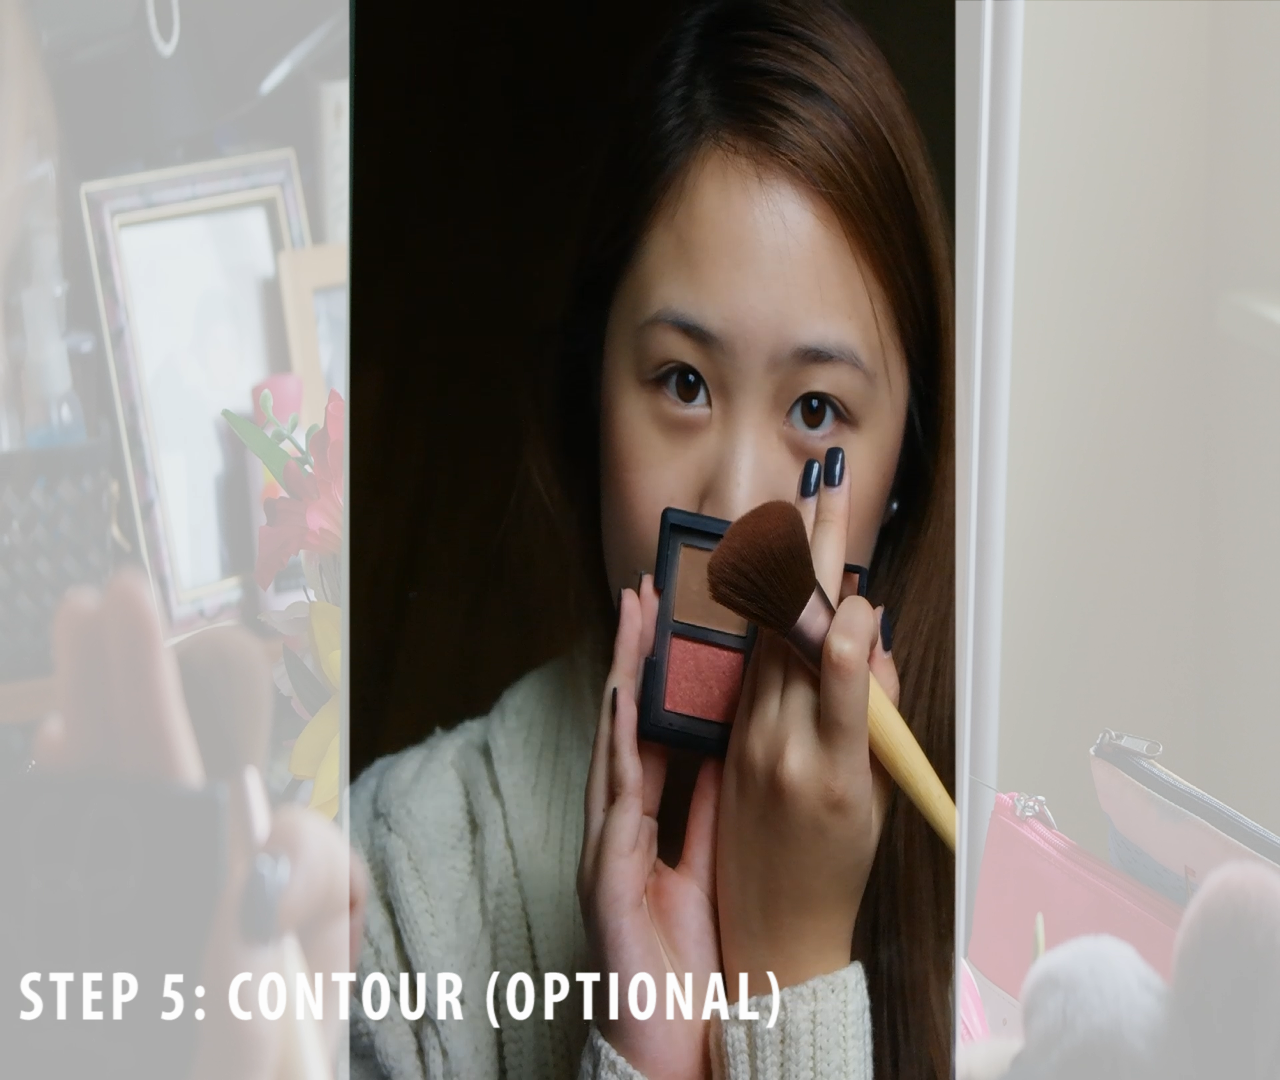
Next using the NARS contour kit in Paloma, I contoured my face, creating. a more chiseled face, contouring my cheek bones and around the face.

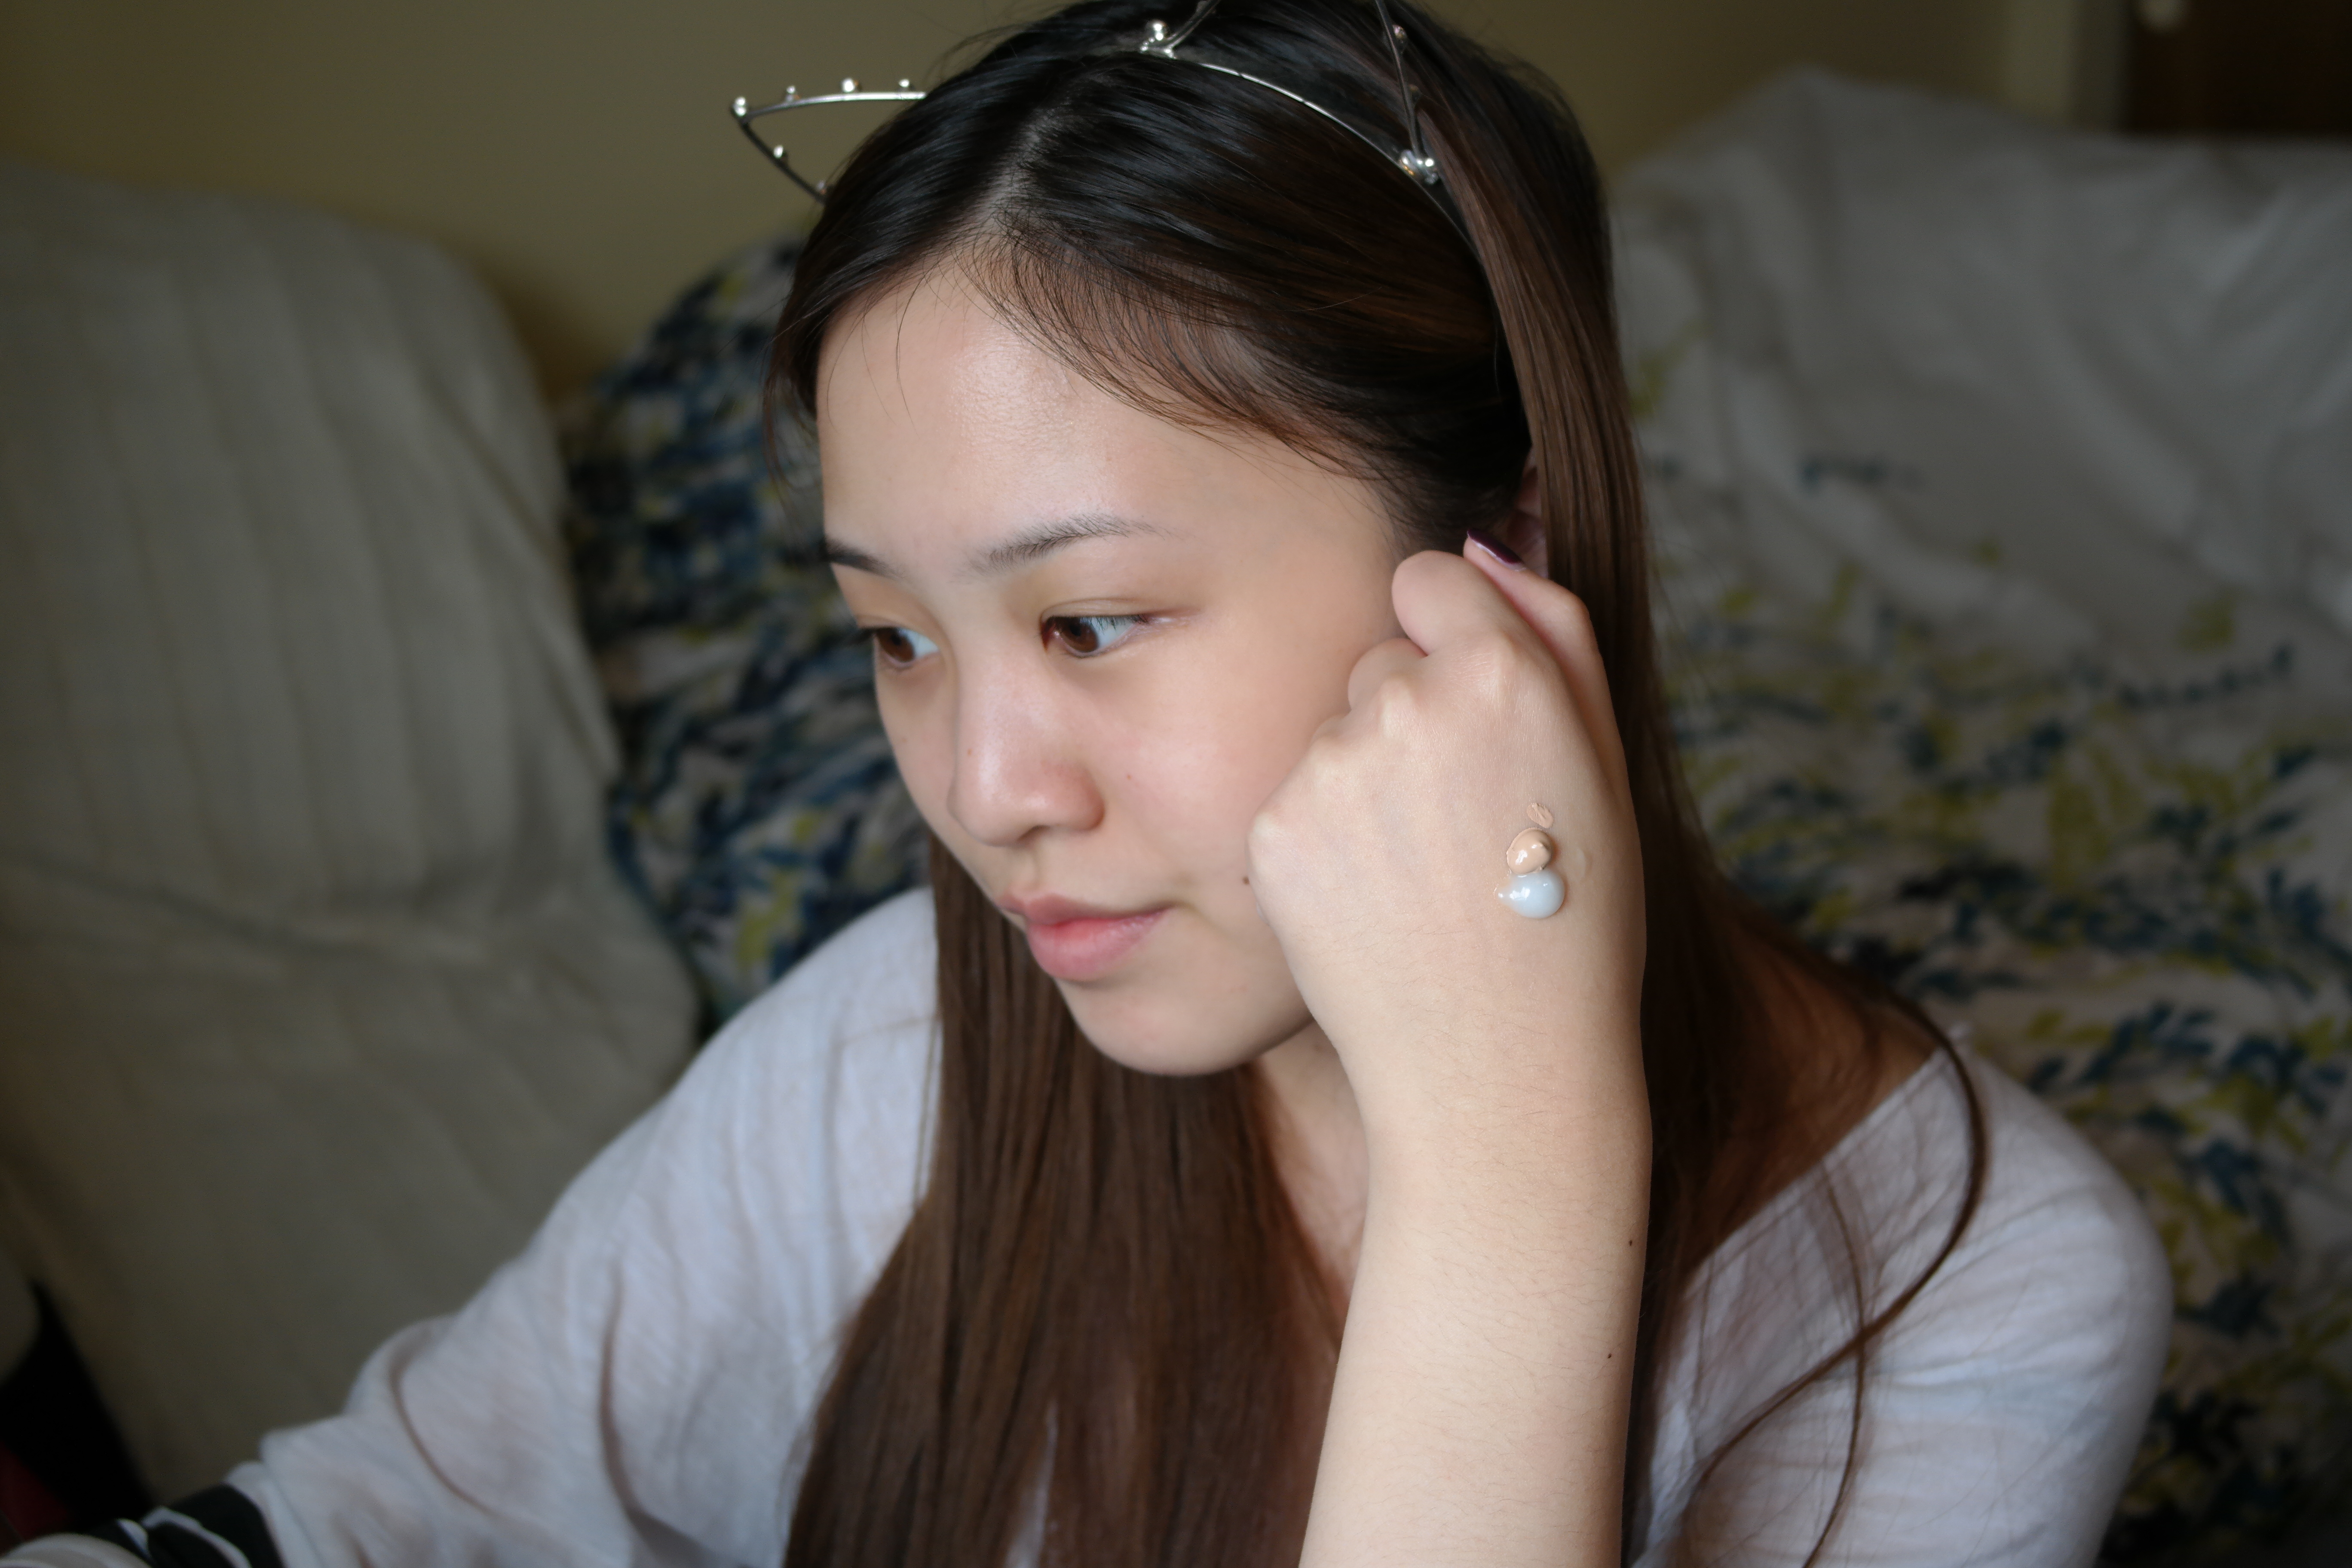
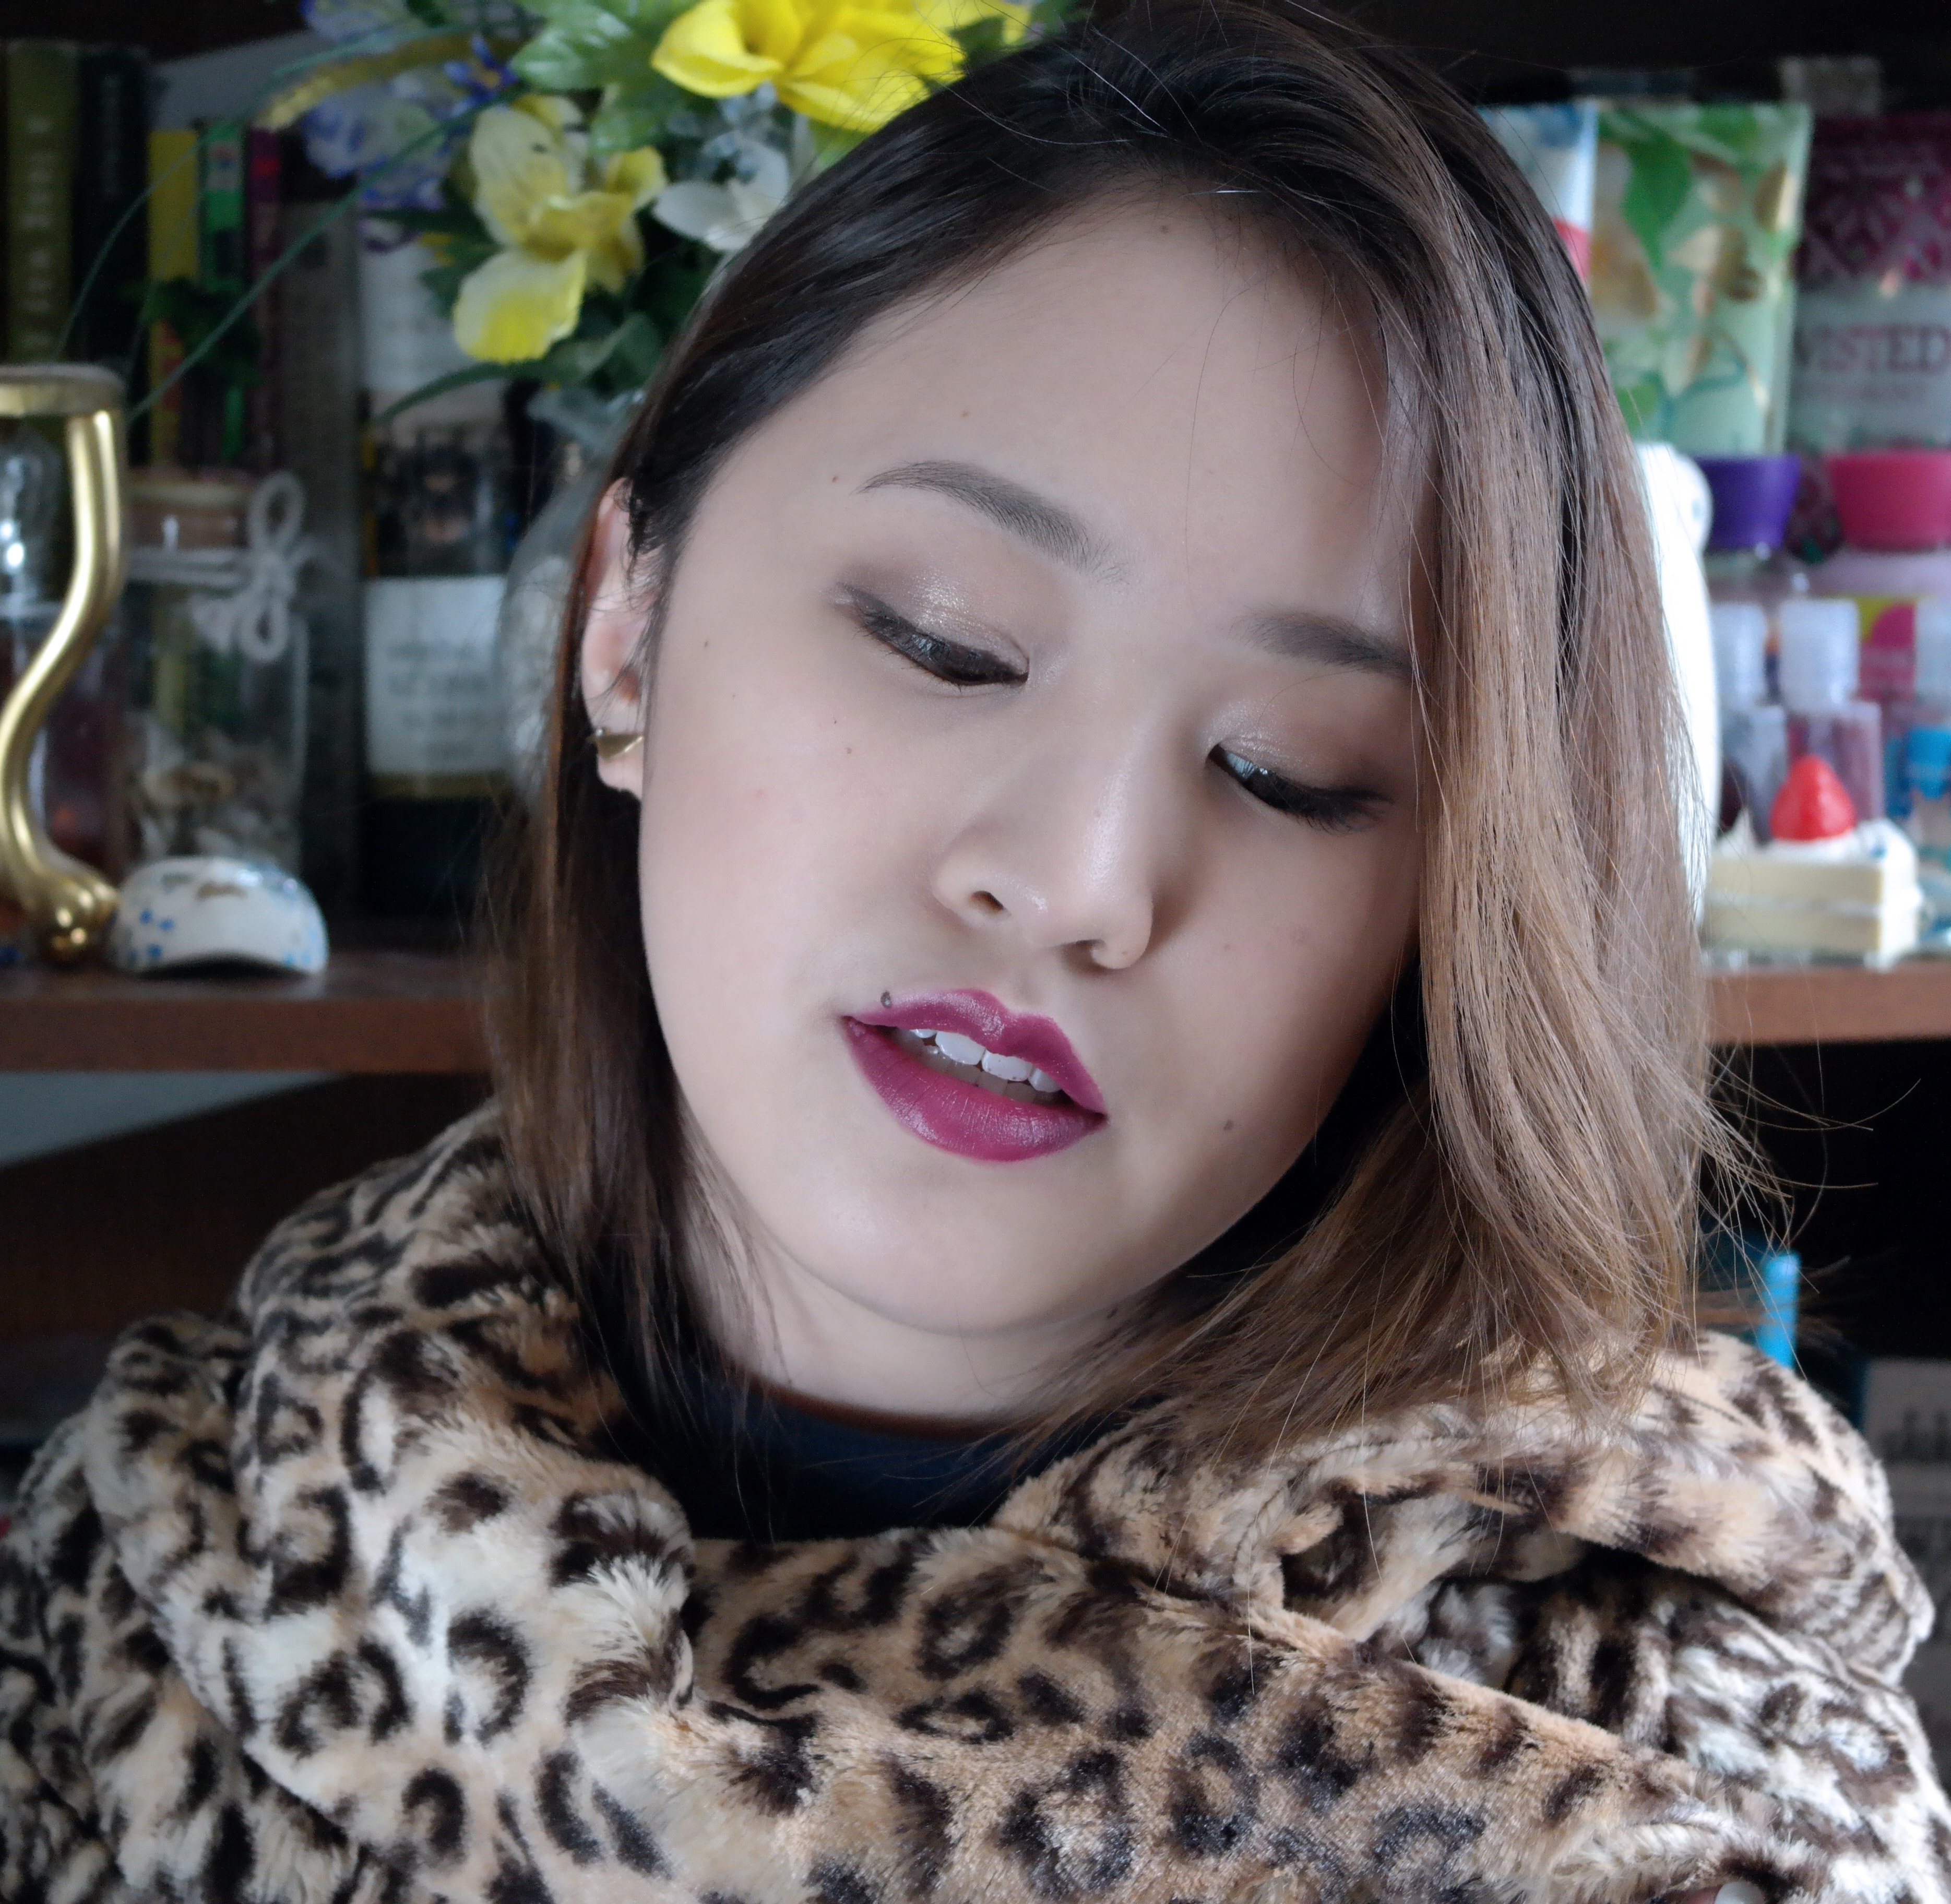
Continuing with the contouring, I used my YSL Touche Eclat (2) to highlight portions of my face, as shown below.

highlight

After that I did my brows using:

ANATASIA BEVERLY HILLS – DIP BROW MED BROWN
ETUDE HOUSE – COLOR MY BROWS 1

Next up is the most intense part of the tutorial, the eye make up. Bling bling~

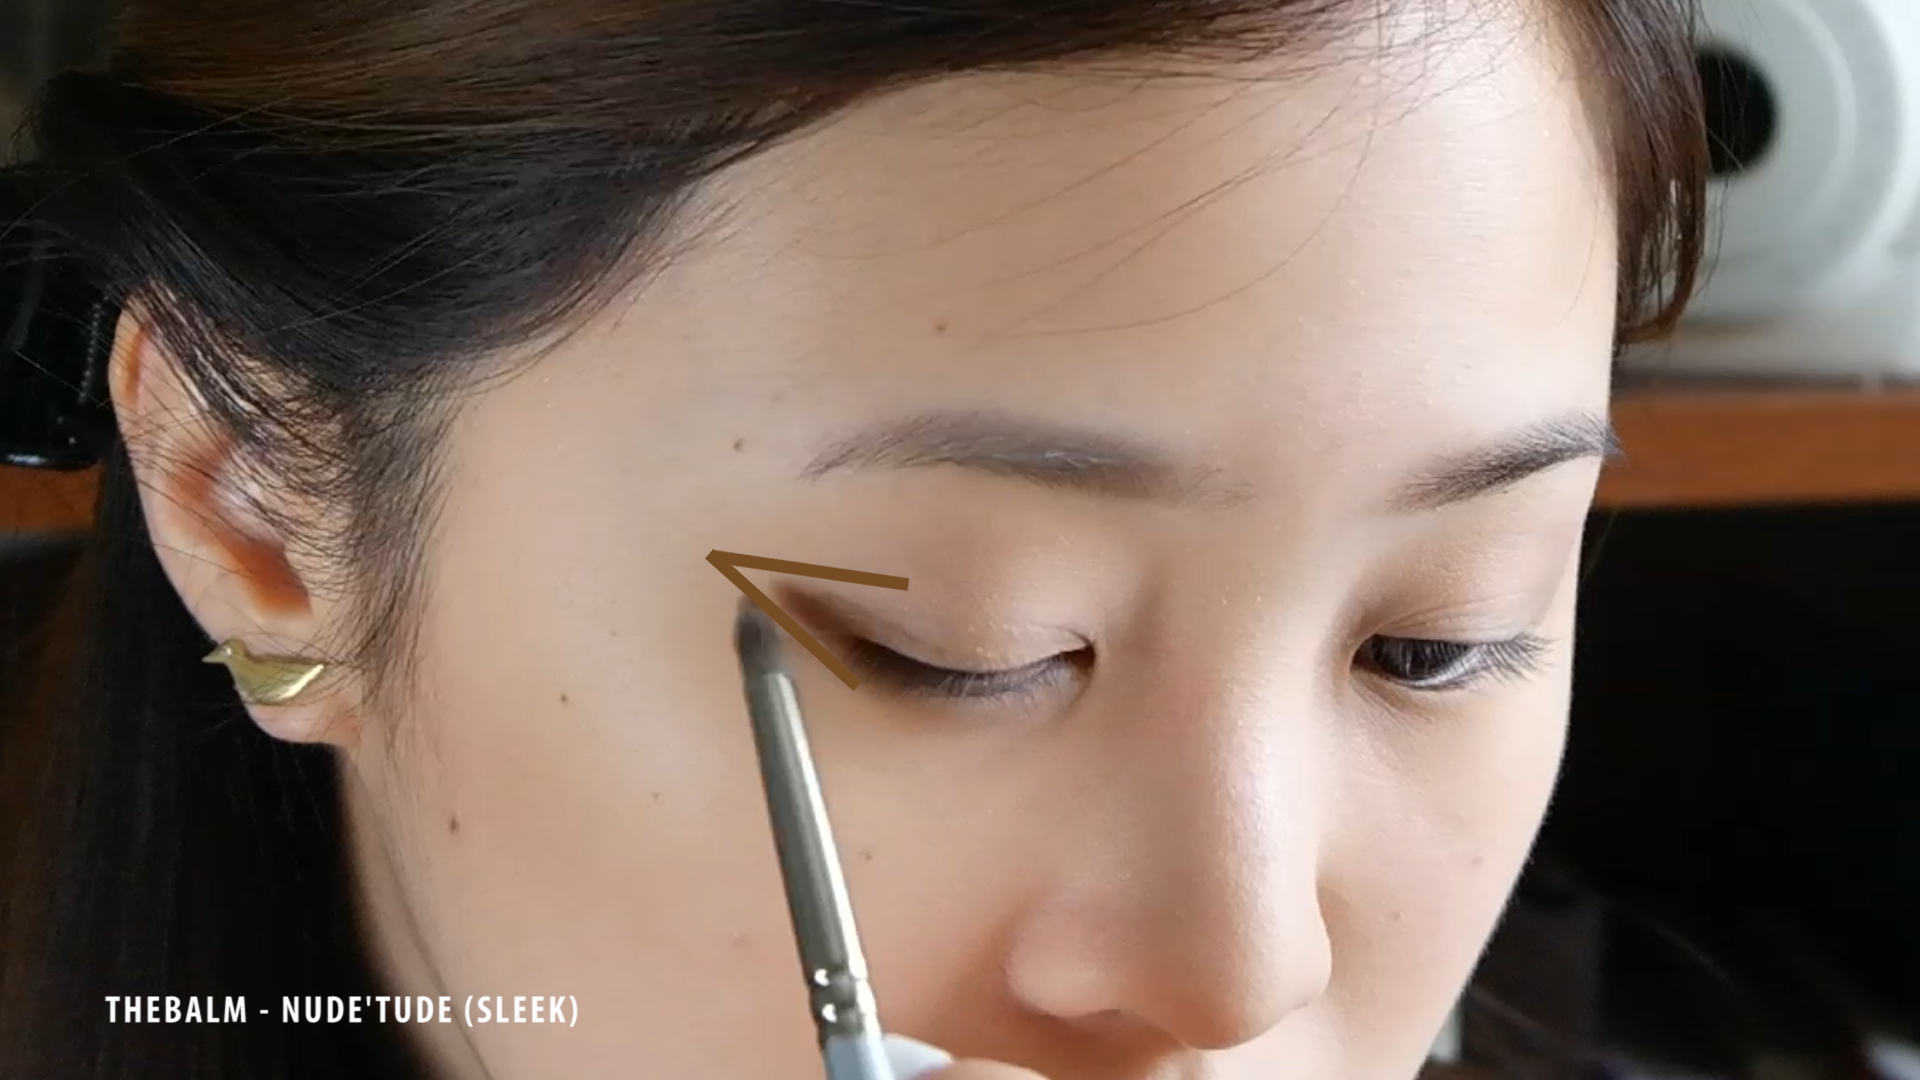
For my eyeshadows I used Urban Decay’s Naked2 Palette and theBalm’s Nude’tude Palette.

I first primed my eyes with Urban Decay’s Original potion primer all over my lids to make sure the shadows intensify and stay put all day.

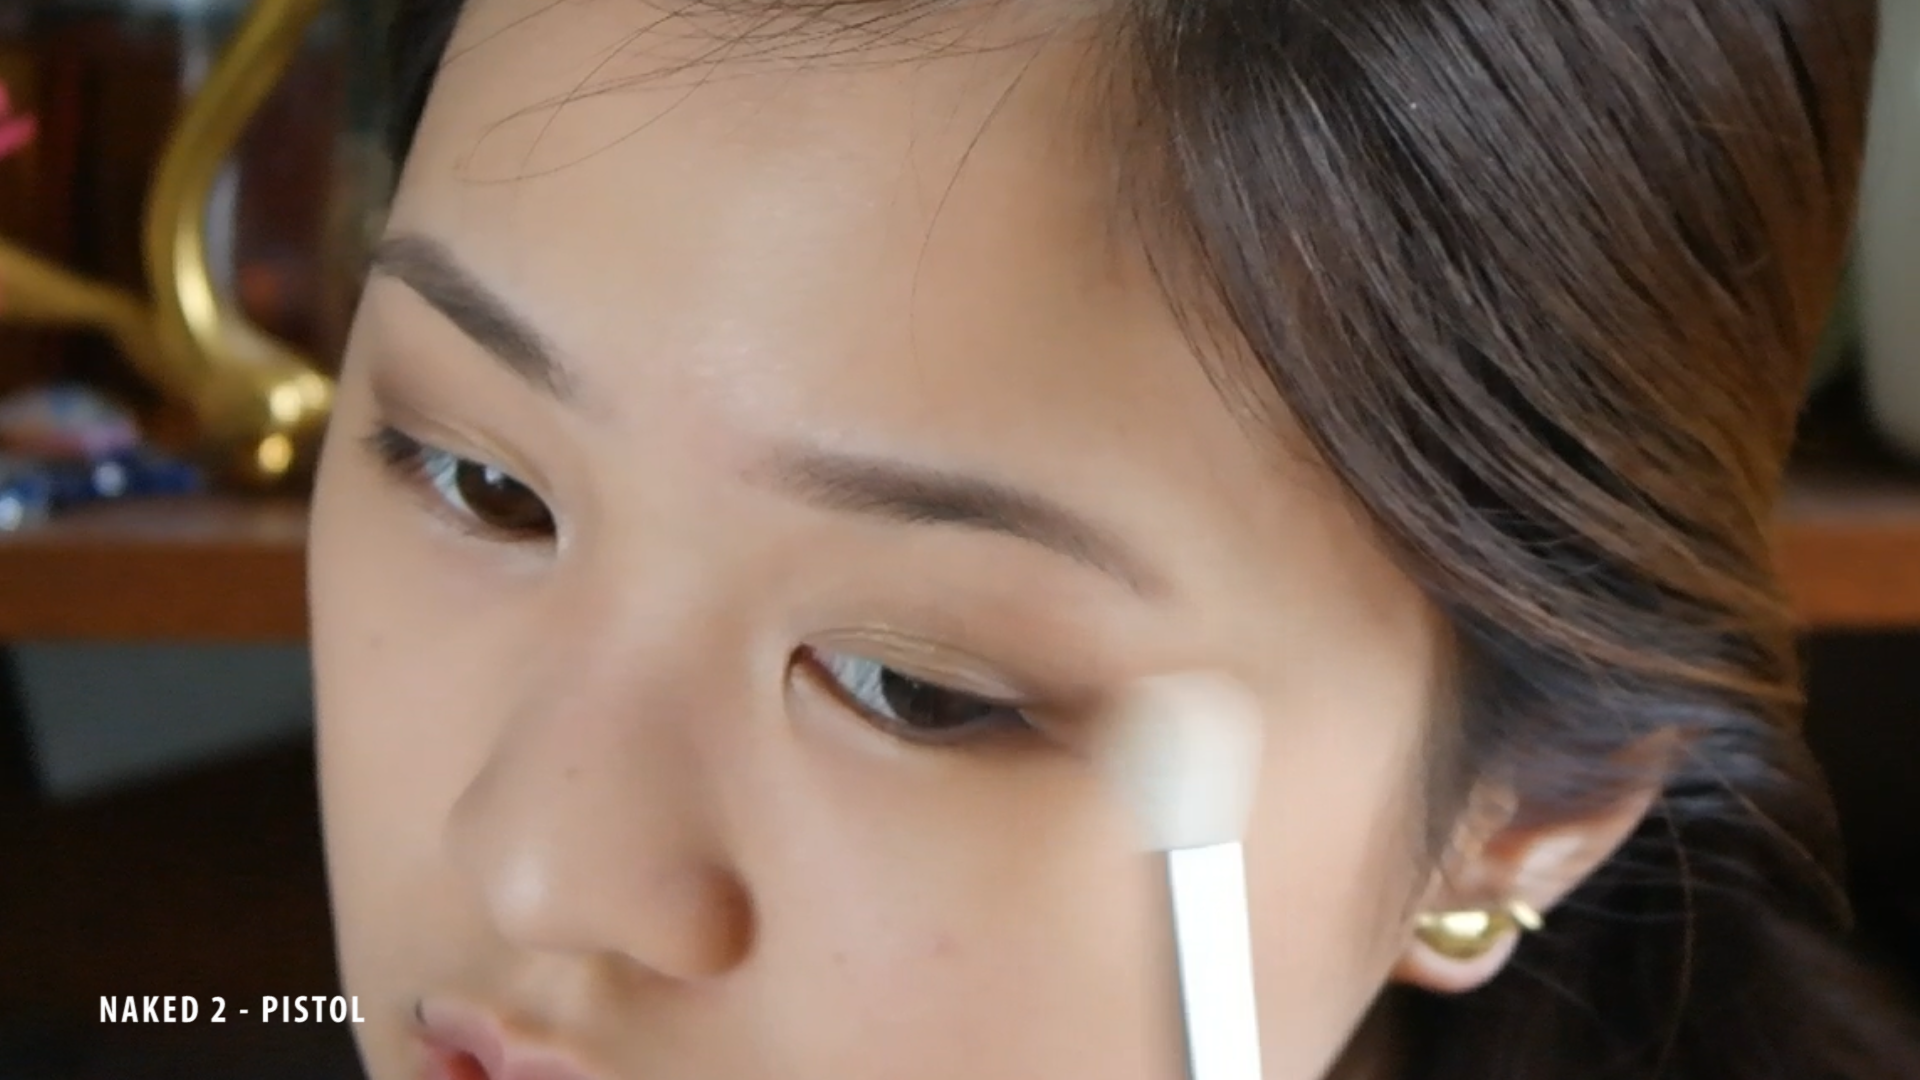
Next I put NAKED 2 – FOXY all over my lid.

After that base it’s basically a gradation, or a build up of color that looks natural. I like to create a sort of smoked out outer corner V shape (like shown below in the big picture).

First off I’m going to use NAKED2 – TEASE in the crease of my eyelid and then with a pointed shadow brush I’m going to build the gradation (brown hues)

4minute cold rain1

4minute cold rain.Still020

And then I’m going to put a light shimmer on the middle of my lids NAKED2 HALF BAKED.

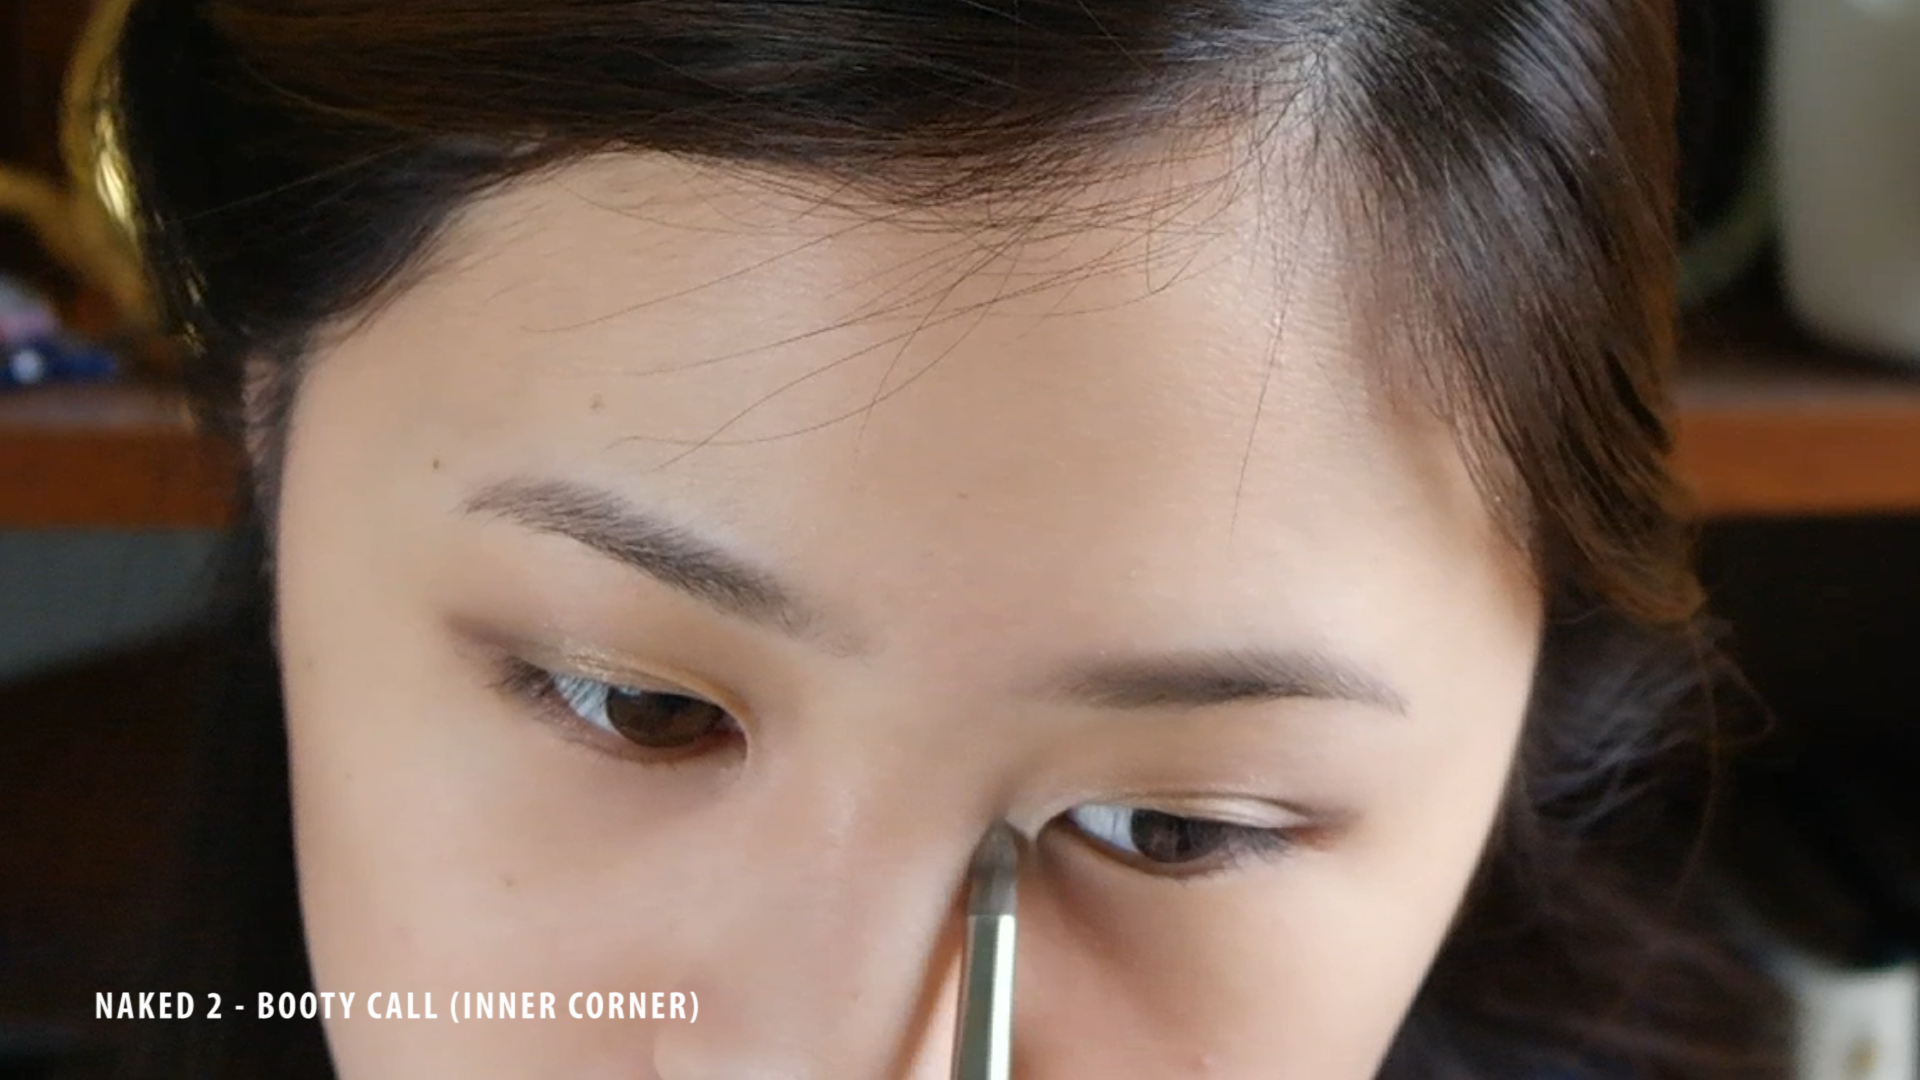
After that I’m going to go back in with a lighter more skin colored highlighting shade ( NAKED 2 – BOOTY CALL) in the inner corners of my eyes and on my lower lash area creating a aegyo affect (supah cute).

4minute cold rain.Still018

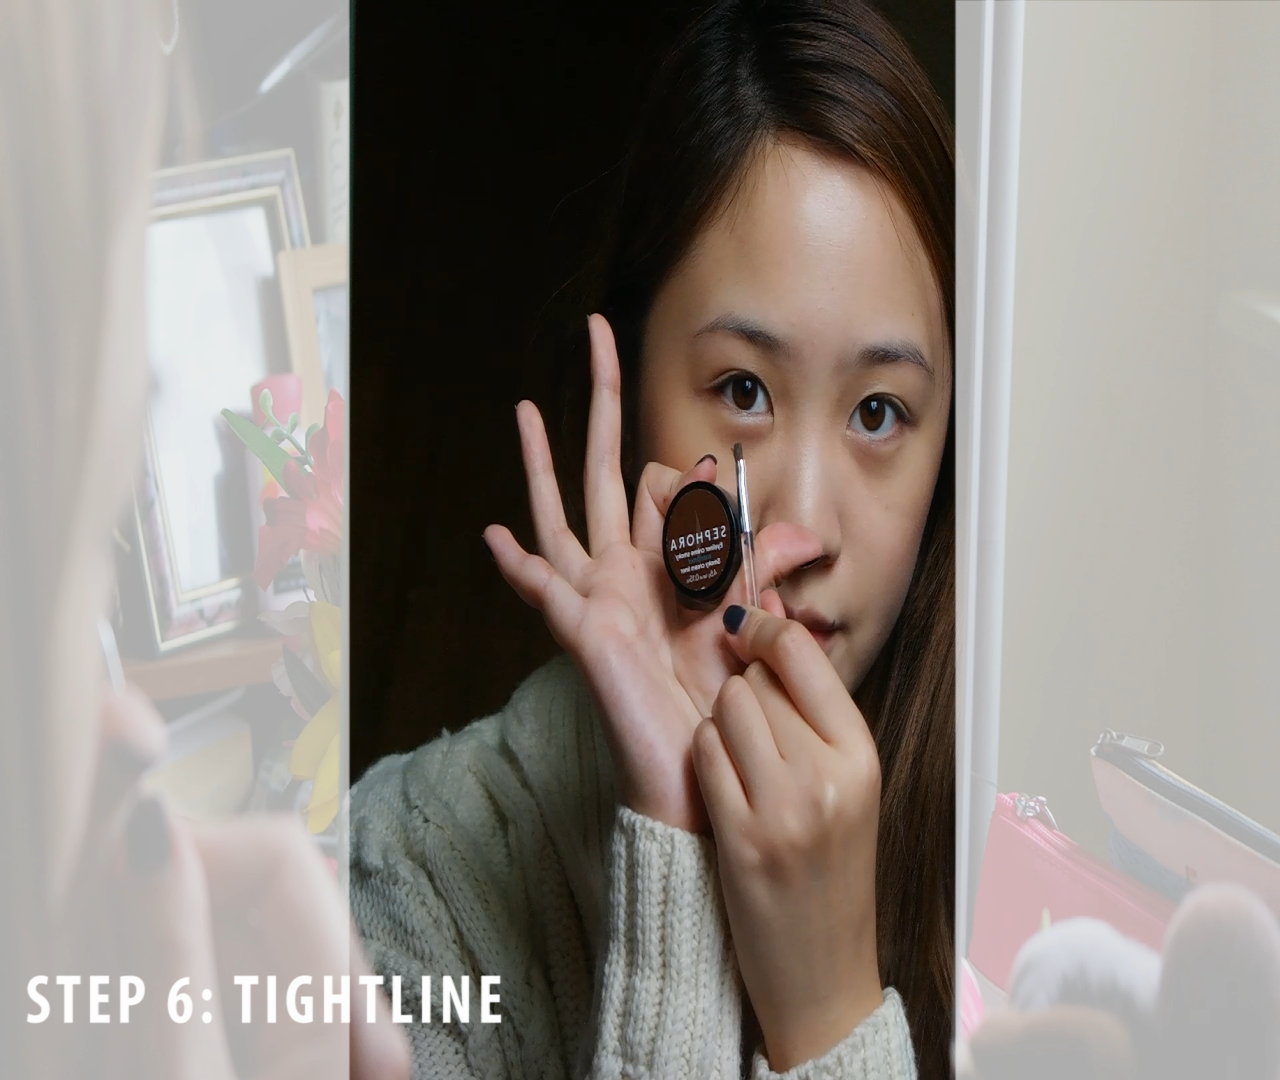
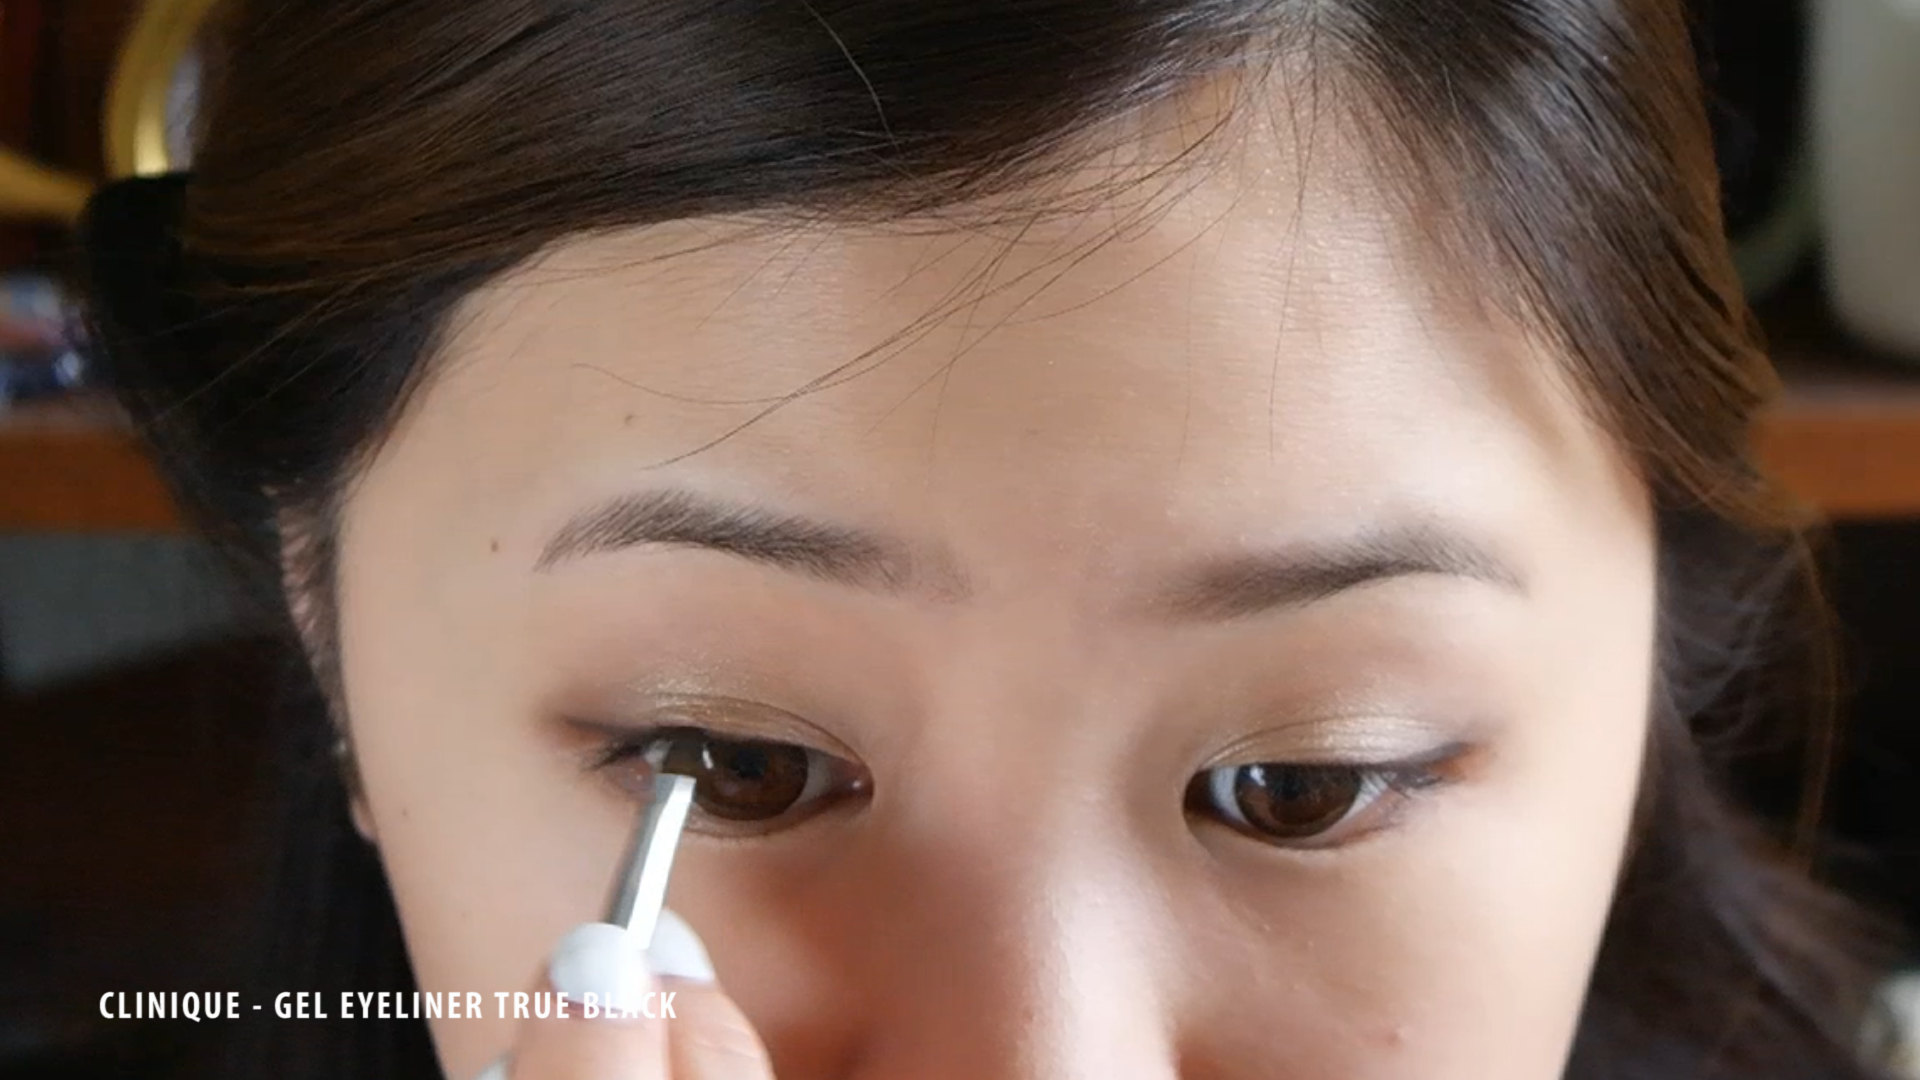
After that I’ll highlight my brow bone again with NAKED2 – FOXY and tightline my eyes using CLINIQUE – GEL EYELINER TRUE BLACK.

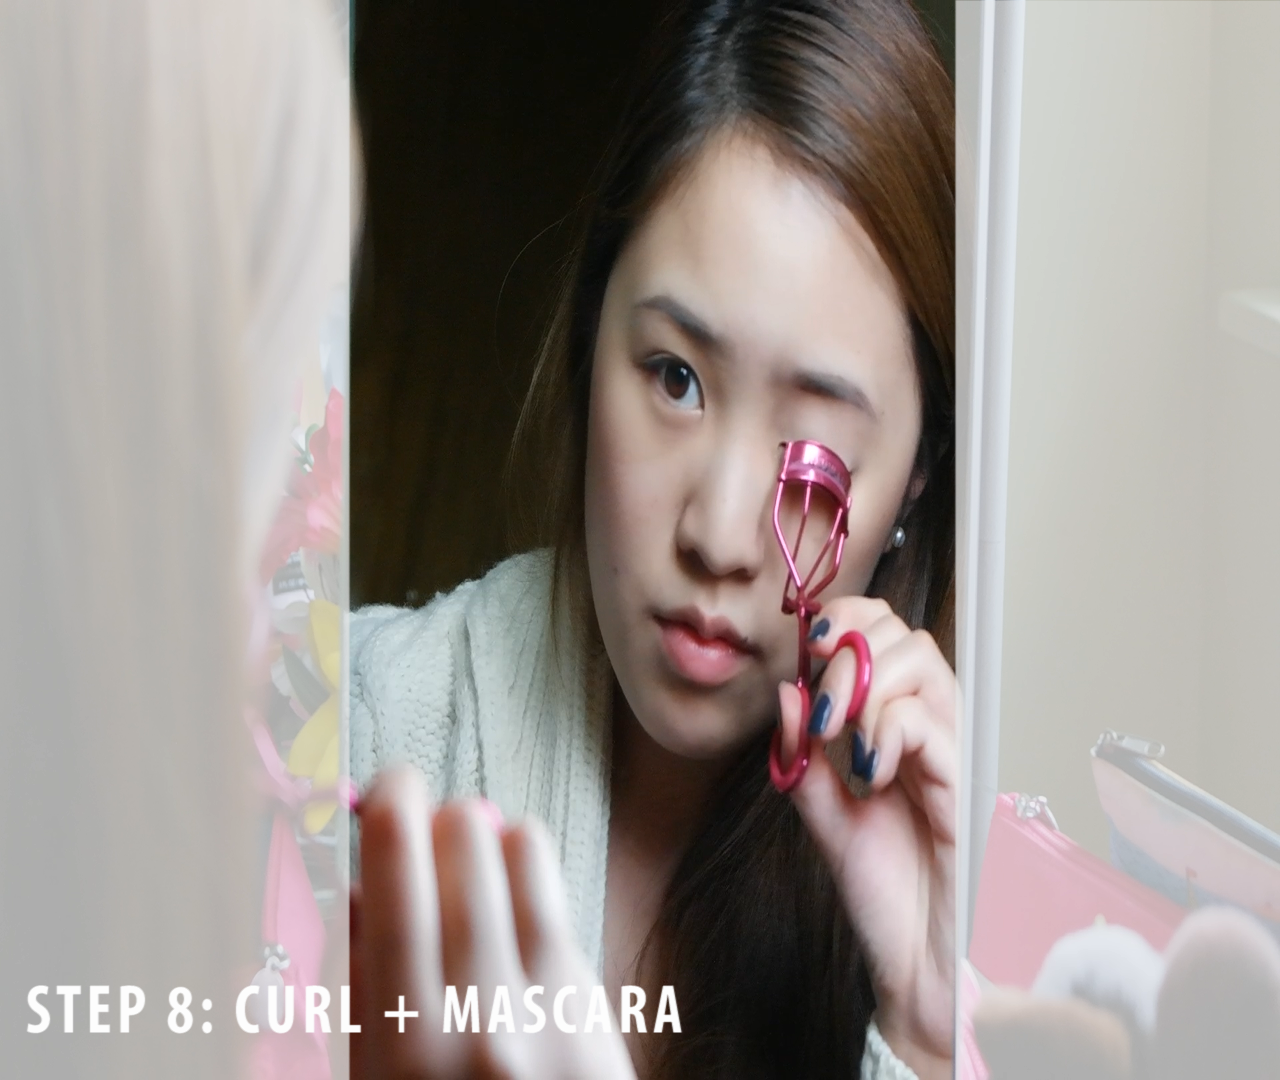
After that my camera died, awks. So I had to charge it, in the mean time I put on false eyelashes and mascara.

HEROINE MAKE – LONG & CURL MASCARA
EYLURE – NATURALITES EYELASHES 020

4minute cold rain.Still023

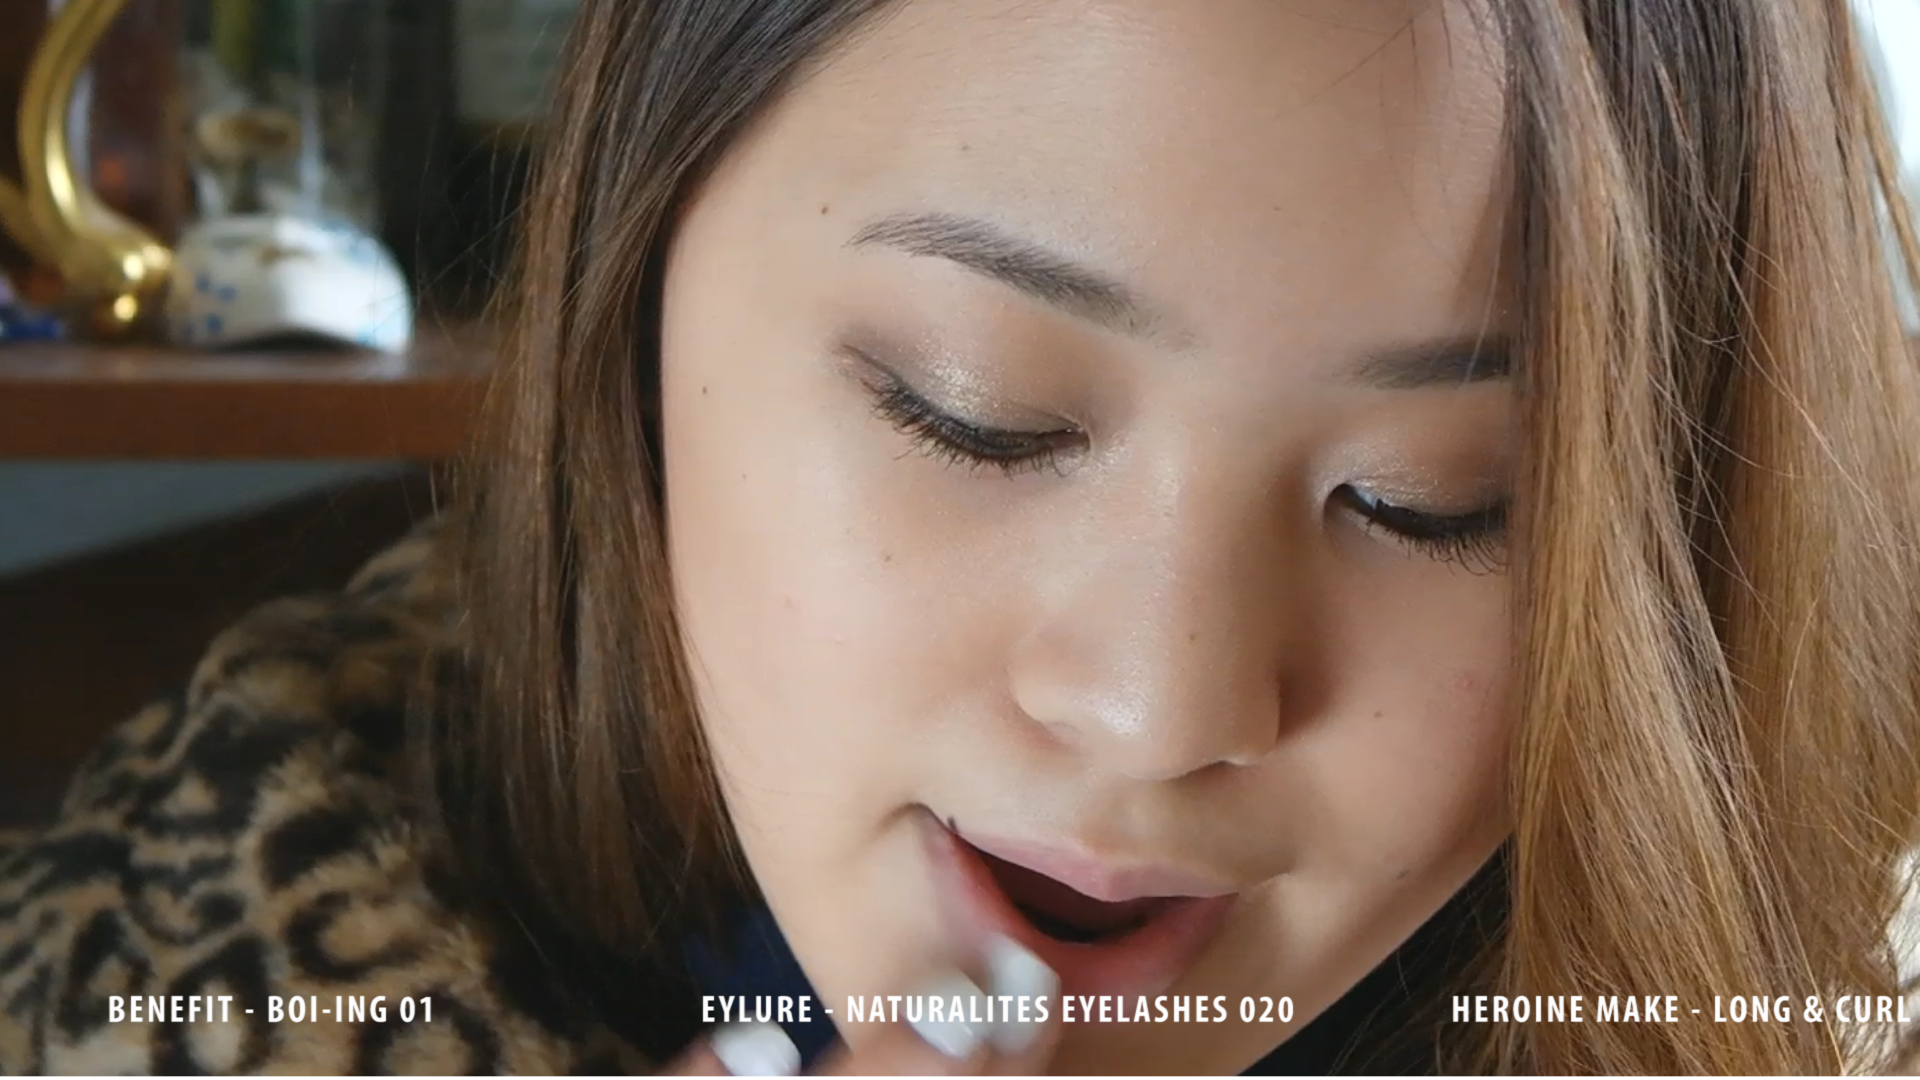
Using Benefit’s Boi-ing (01) I covered up my lips to help create a finer lip in the end game.

Starting up the lip game, in this look the lipstick or the lips are the statement piece. All focus should go on the lips so a little prep goes a long way.

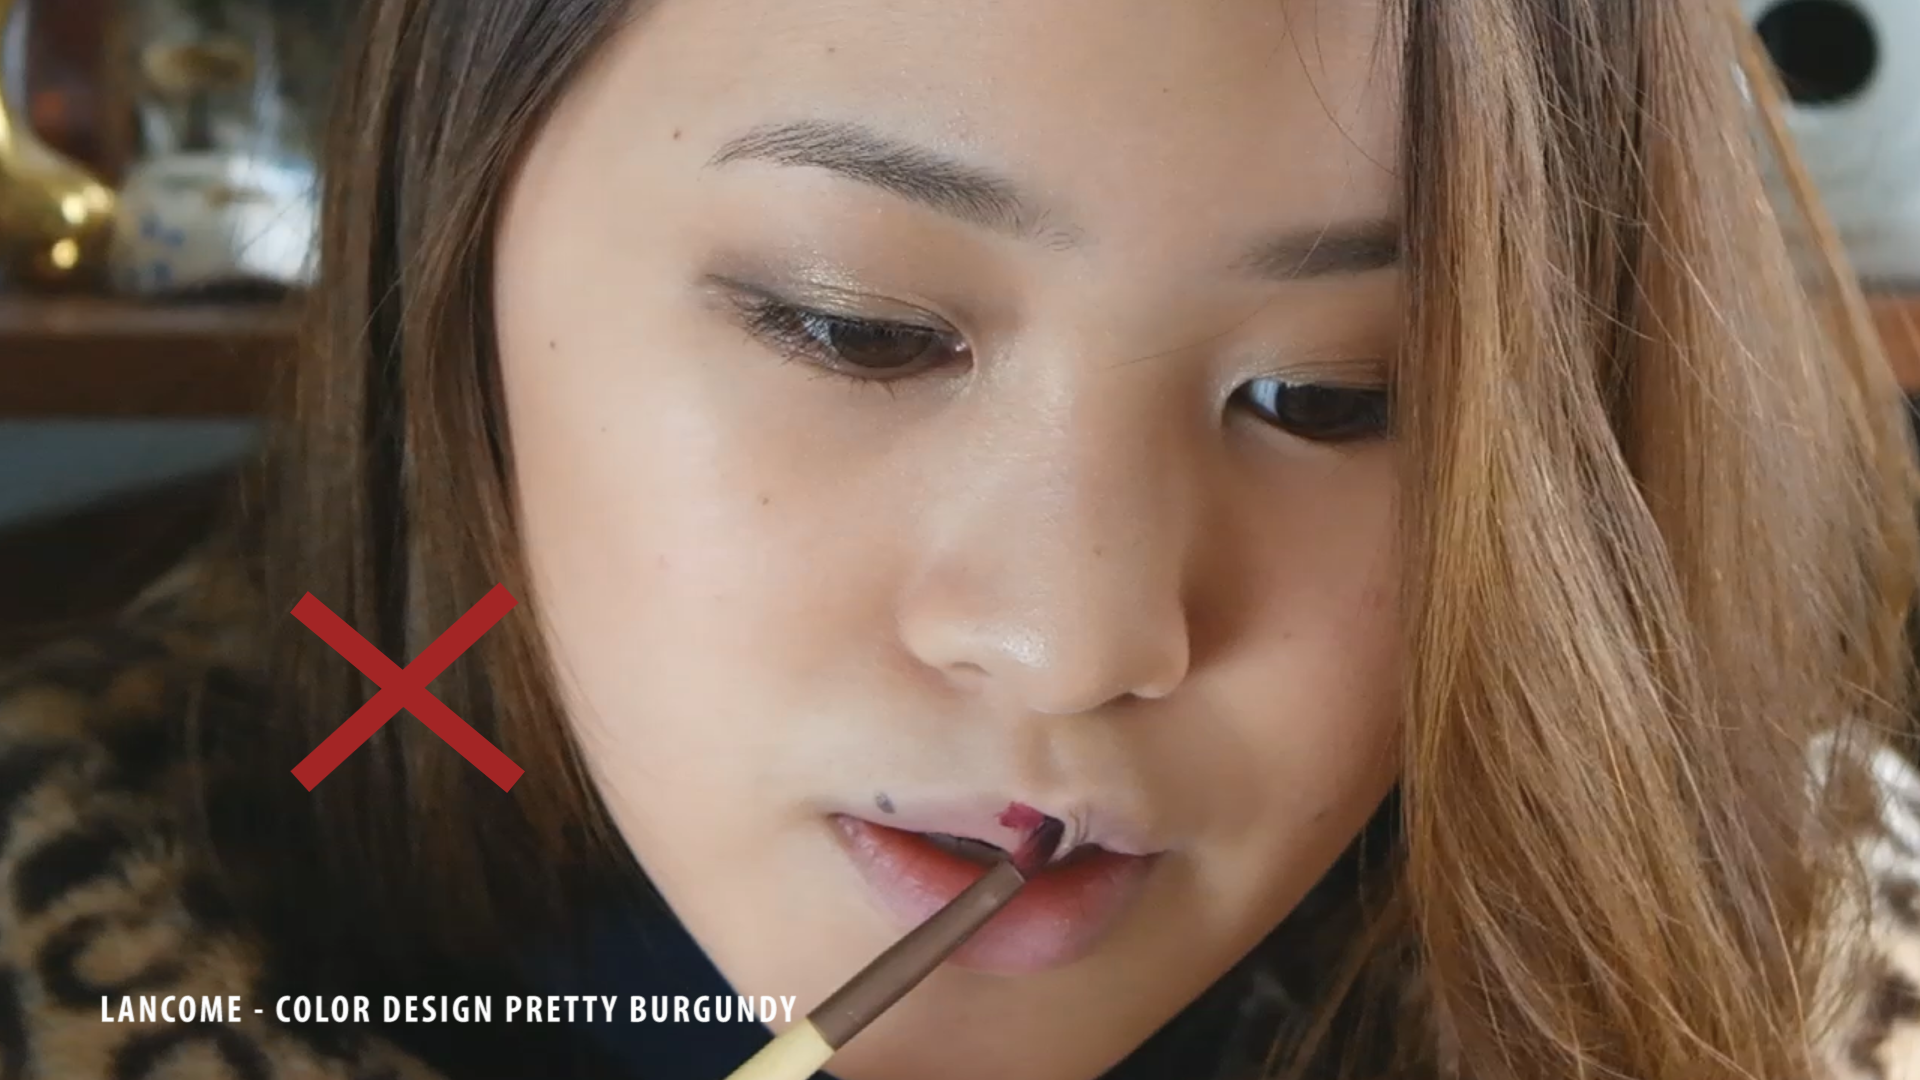
I’ll be using LANCOME – COLOR DESIGN in PRETTY BURGUNDY for my lipstick shade.

By using the X mark technique for the top of the lips, you make a more defined top lip.

4minute cold rain

4minute cold rain.Still025

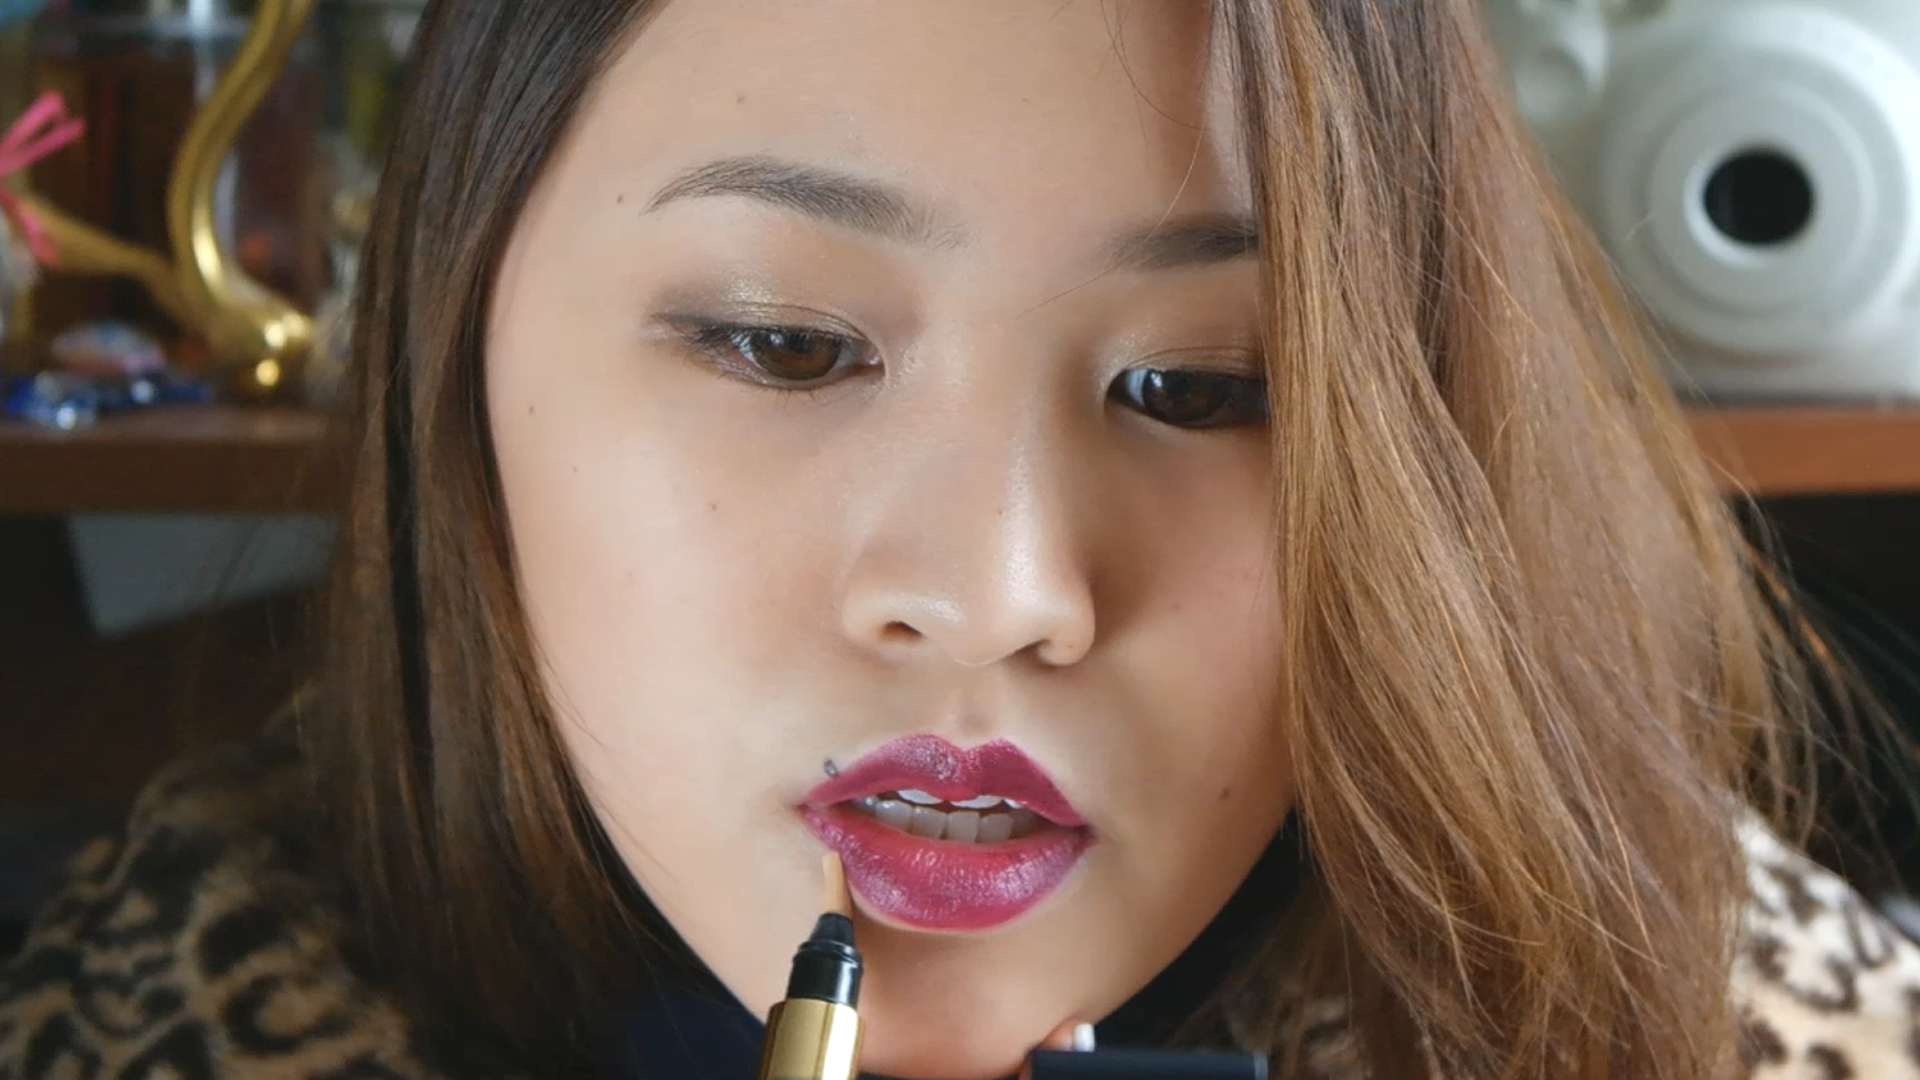
With the lips being the statement piece of the look it never hurts to go back in with a concealer (in my case YVES SAINT LAURENT – TOUCHE ECLAT 2) and make sure the lips are on point.

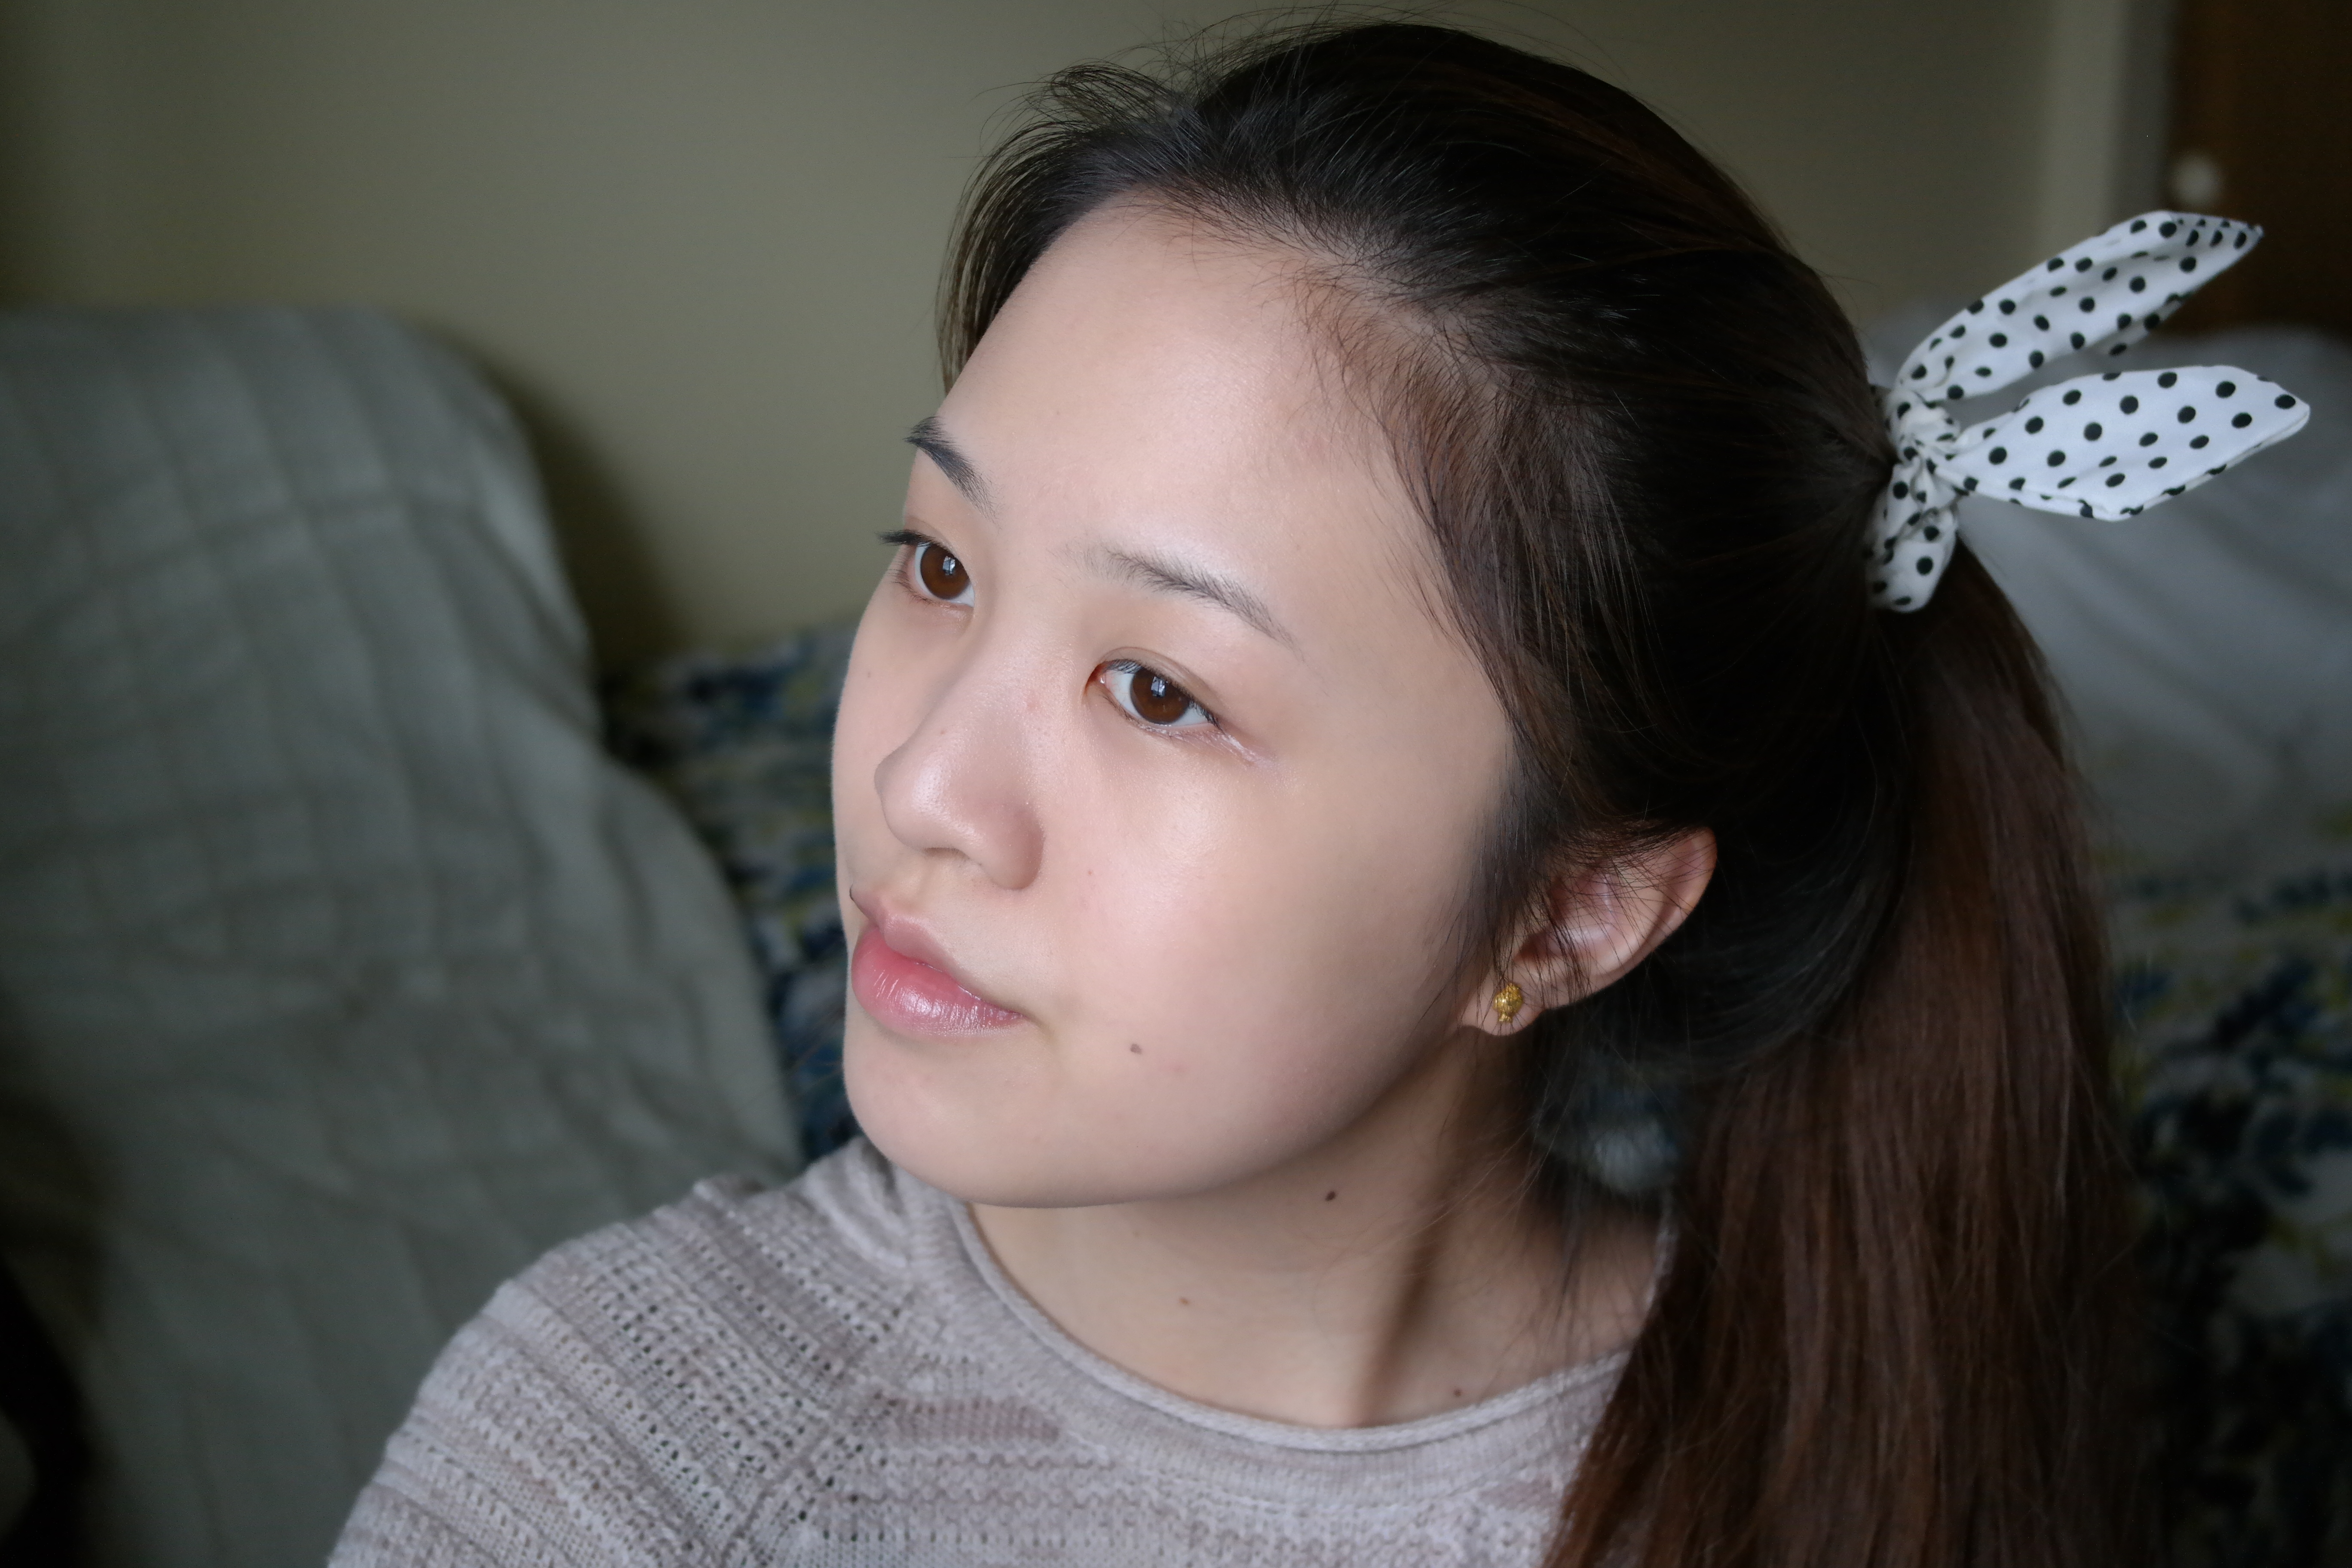
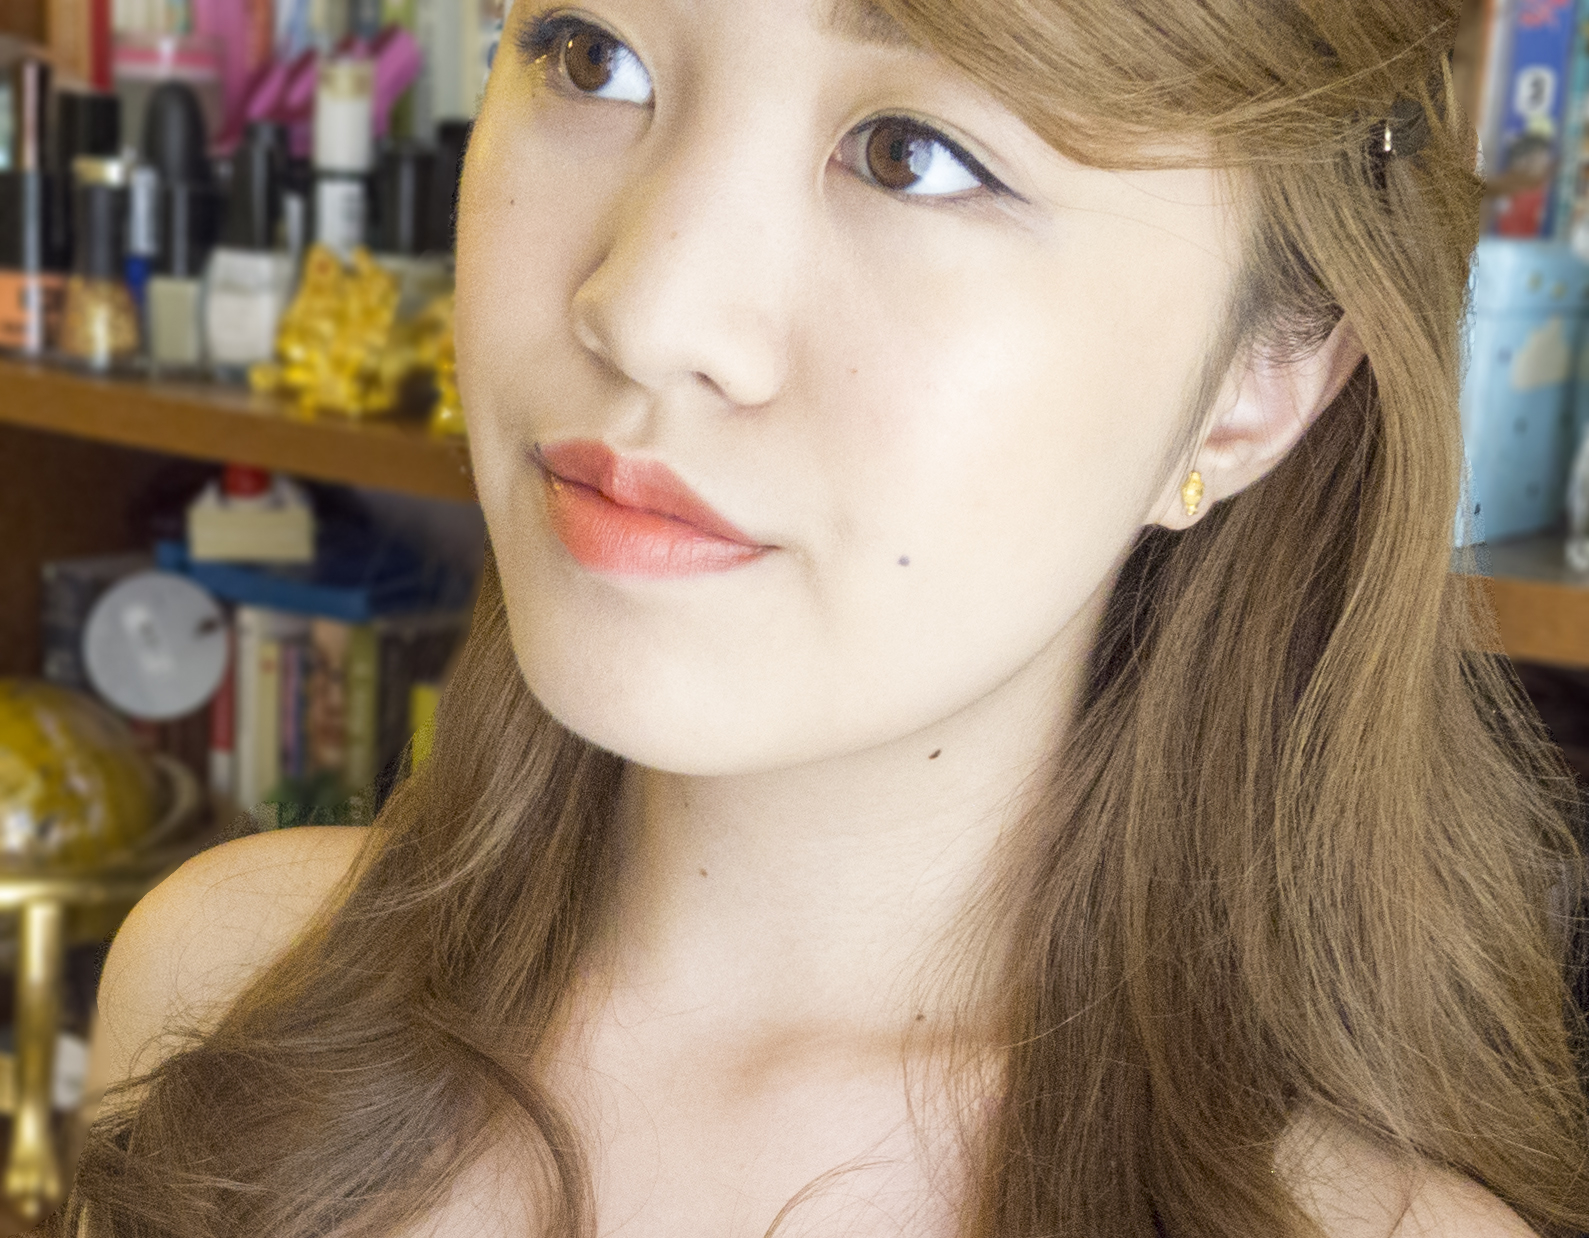
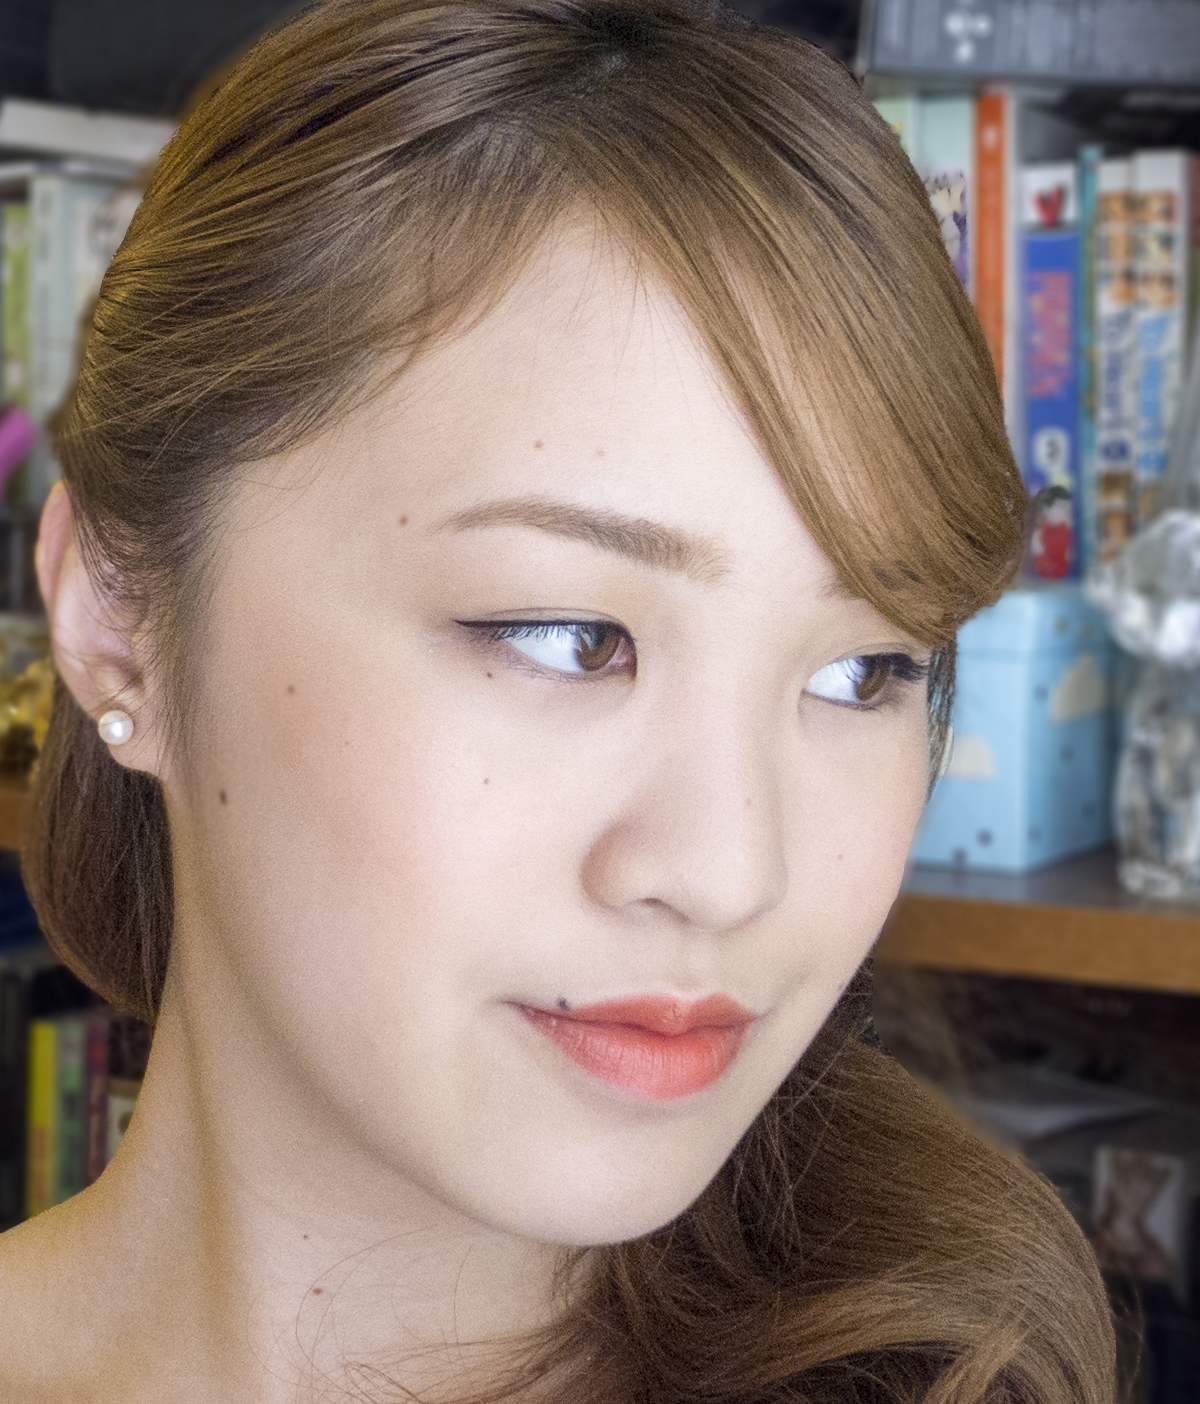
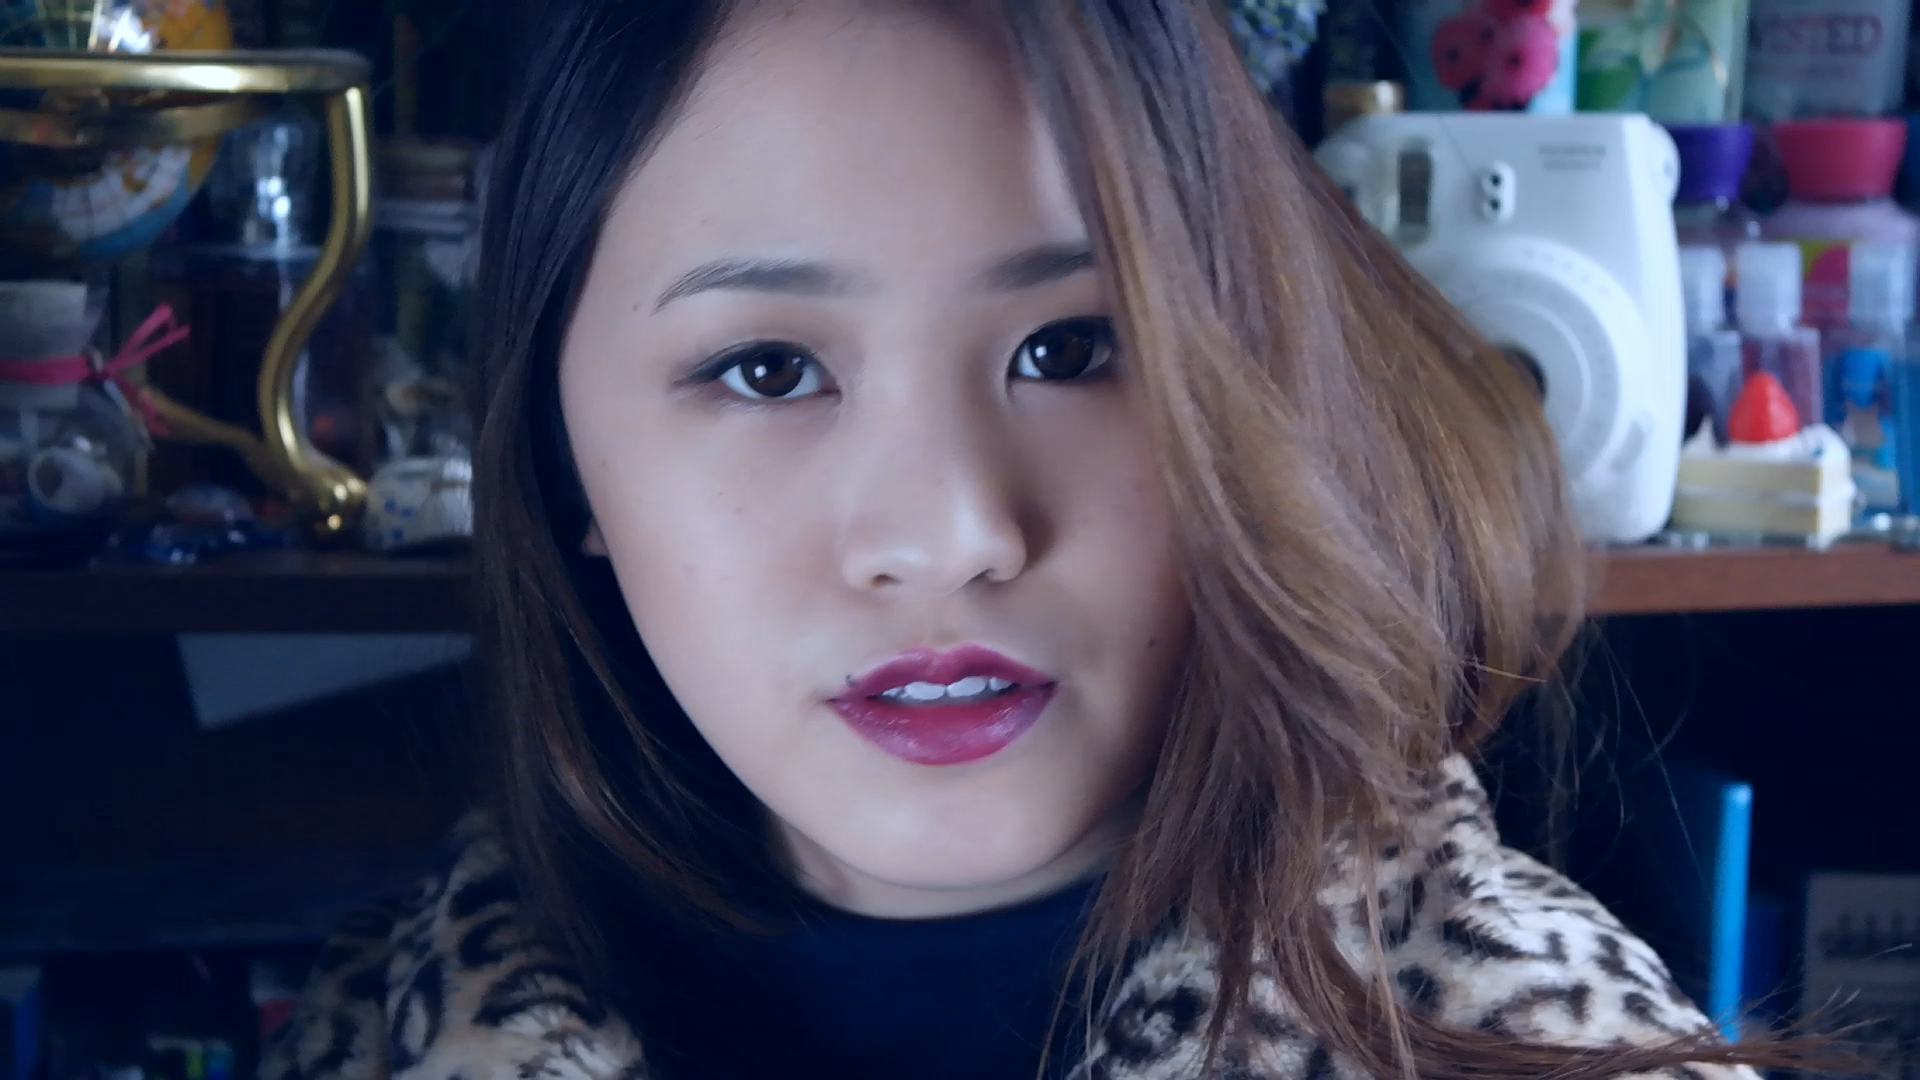
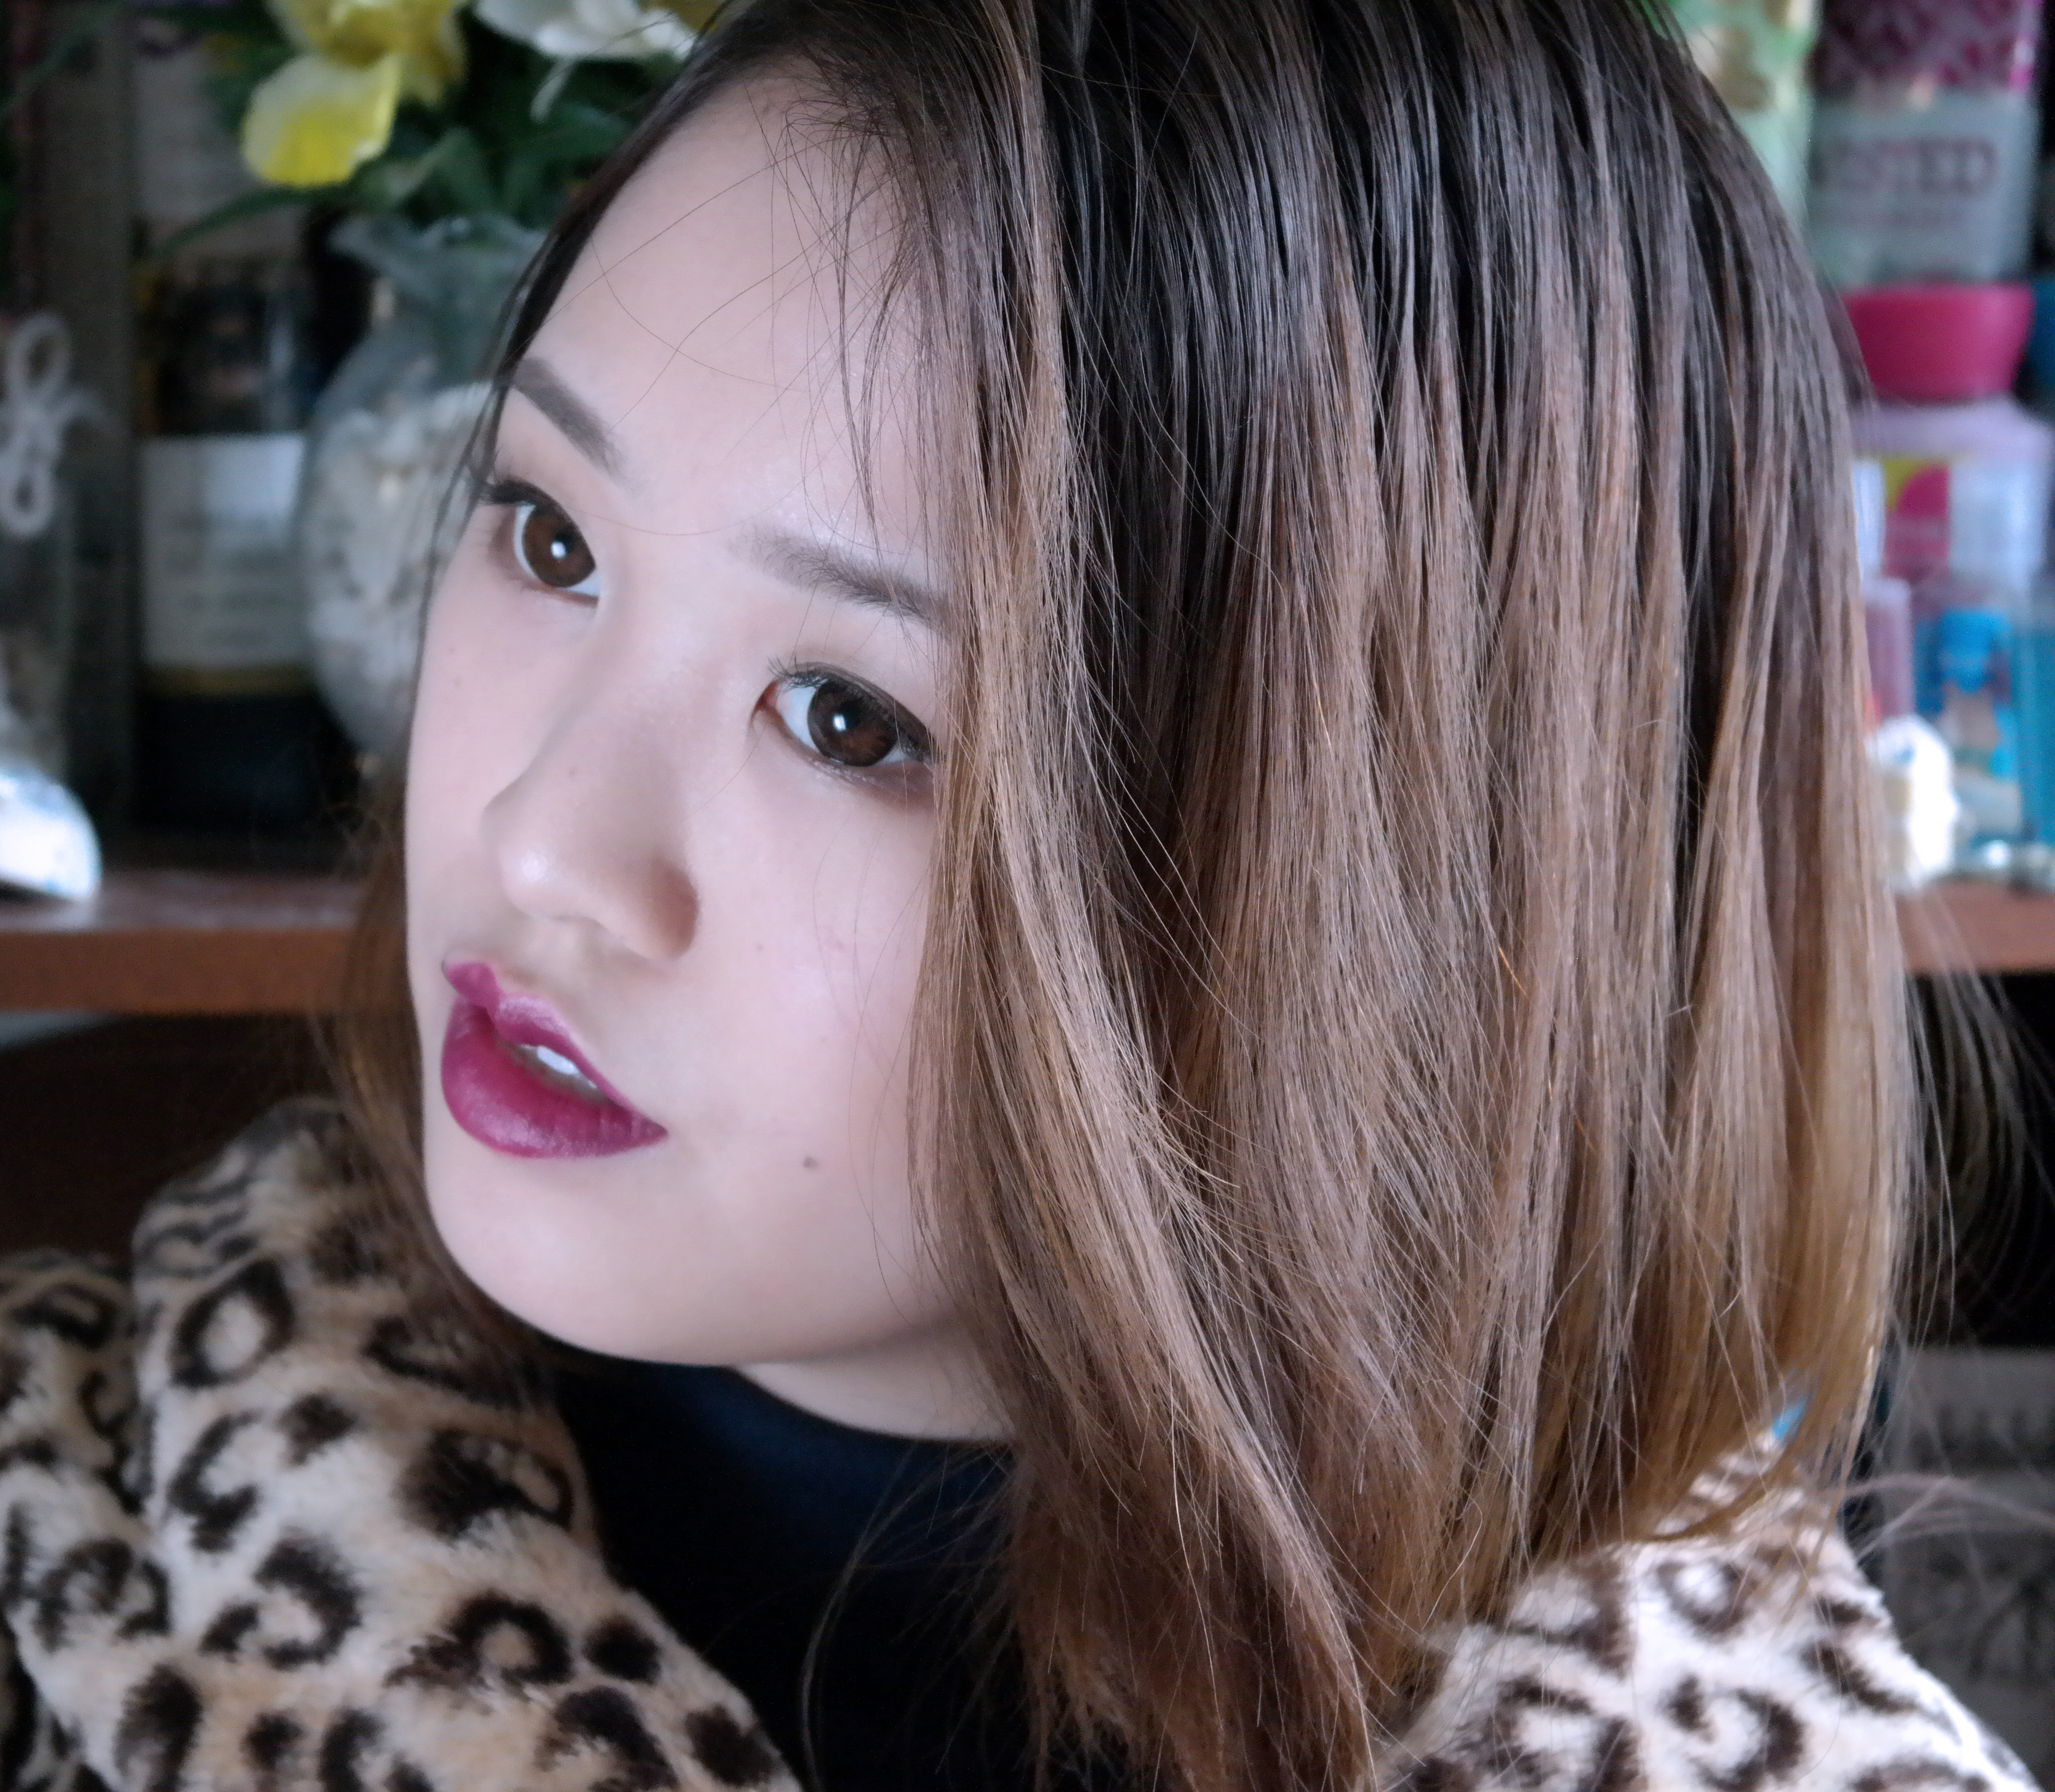
After that, we’re finished. Ta-da, my 4MINUTE Cold Rain Gayoon look is finished, let me filter it up and we have the finished look!

4minute cold rain.Still032 4minute cold rain.Still033 SAMSUNG CSC SAMSUNG CSC SAMSUNG CSC

Thanks for reading guys, be sure to check out everyone’s looks too!

bntgirls badge

Advertisement

Bntgirl x Amaranth Ultra Hydrating Cream

Snowwwwwww day!

Sorry for the week long break between two reviews, but I finally had time to edit the video footage I had since it has been crazy snowing in my area. School has been excused, and now I’m back to my blog in my spare time.

Today I’m be review Amaranth’s Ultra Hydrating Cream, it’s described on it’s packaging sort of like what a face primer would do. It says it’ll help instantly retouch, smooth and revitalize your beauty performance (of the face). Sounds a lot like a primer, no?

However I’m Sherlock Doris and I have free time and I decided to find out what it really is.

I found it’s a Cosmetic company owned by Samsung, gasp! No, haha I meant what it does to your face, but in all seriousness it is owned by Samsung.

I’ve tested it two ways, before foundation (or bb cream) or together, mixed.

In between I wanted to show how I looked with just regular BB Cream on. I’ll be using Lancome’s BB cream and also Photogenic Luminesse.

To be honest it doesn’t feel like any of the primers I’ve ever used but it feels oddly similar to my starfish creams, the consistency is about the same and it feels like it instantly hydrates my face after application. In fact it’s eerily similar to the Sorabee Starfish cream I previously reviewed here.

DUN DUN DUN Sherlock Doris discovered they are managed under the same company! It’s a whole new roller coaster!

It gives off the similar floral-ish scent but I much more prefer the Ultra Hydrating Cream!

Anyways into the more important information. I’ll now show you the differences between the different ways of putting it on.

First, using it as a primer, I’ll put it on before foundation. You’ll see it mattefies my face and almost makes me a bit whiter, sort of like Missha’s MM Bloomer.

SAMSUNG CSC

STAY ALL DAY MATTEFYING!

Next is just foundation so you can see how it is regularly.

SAMSUNG CSC


Now to quickly compare the both side by side.

amareth.Still002


As you can see I look much more dewy with just foundation, what you can’t see is that I felt much less hydrated with foundation, I had a few flaky spots on my forehead.

So what I really want was a compromise, I wanted dewy skin that was moisturized and that helped my complexion.

Tada, I read that you didn’t just need to just use it as a base but as combination. You just mixed a equal parts of each with a brush before application. This gave me my favorite complexion! Dewy and happy skin!

SAMSUNG CSC SAMSUNG CSC

Fantastic, radiant glowing skin.

Now to compare all three.

amareth.Still001

Yep, so that’s how I like it! Mixed together in application! It creates a nice hue for winter perfect skin! BYE BYE SKIN FLAKES!

Sherlock Doris out!

Unfortunately it’s not currently available online, must be a new product (much excite!) But when it’s available I’ll link it below.

I’m giving this a 8.5/10, it’s a fantastic face primer moisturizer and together it does some voodoo magic on my face!

Check out the other BNT Girls: Joanne, Kine, Carina, Bella.

Follow me on Twitter or Instagram for more updates.

bntgirls badge

Interview Make Up Tutorial!


Hello everyone, I’m back! Sorry for the almost two month long hiatus. I swear I’ve been secretly taking pictures and stuff… I’ve just been in a sort of slump/busy school year, gah.

Anyways I’m back by request of a friend to do interview make up! It’s really a no make up make up tutorial but matte, you don’t want to seem dewy/oily for your interviews! You also want a make up regiment that doesn’t take more than 10 minutes. Since you’ll be preparing yourself with materials before the interview to prep yourself. This should optimally take less than 10 minutes.

I know it’s interview season now, so good luck everyone! I’m hoping to do well also…!

It’s a really simple tutorial, that makes you look ready and fresh faced for your interview. Basically it makes you look like you’ve actually had 8 hours and sleep.

Alright so I’m going to also do a written tutorial of how to my interview make up, just in case you’re really busy and you don’t have time to watch a 4 minute video or you want a brief refresh. I’m also going to list my products here! 🙂


1. You start off with a sleep deprived face. So the first step is to prime + moisturize your face, primer + lotion + chapstick if you’d like.

I just used my Burt’s Bees chapstick (my fav) and some face lotion to moisturize (Fresh’s face lotion).

Interview.Still004

Aww yiss look at my tired naked skin, don’t worry you’ll look fresh and ready after my tutorial!

2. Second step really is to conceal EVERYTHING. Eyebags, pimples, red spots. Everything. You want to seem like you aren’t freaking out about this interview, that you’re ready….So ready in fact you look like you slept like a baby last night, but you didn’t.

I’m using Missha’s Under Eye Concealer, it was a pretty sweet deal at $5. I’m using it today instead of my higher end products because those are pretty time consuming, but I suggest if you do have more time than 5 minutes to do your interview make up, use your higher end ones.

Interview.Still005

Remember to use only your ring fingers when blending away the concealer under your eyes! We don’t need a early onset of eye wrinkles.

3. Step 3: Is to use a MATTE foundation, really stressing the matte-ness of it. You don’t need to look so fresh and dewy, you’ll eventually look oily. Because let’s be real, when we’re stressed we sweat and produce oils on our face. Best method is preventative. So let’s go with a matte foundation, yes you may not “glow” but at least you won’t be oily.

I’m using Lancome’s Dual-Finish Powder Foundation in Porcelain.

Basically I just buff it into my face using a large powder blush, light but even coverage. Feel free to layer in some more if you need high coverage.

Interview.Still006

Step 4: I like to add some blush with a light hand, because I’m already pale, I don’t want to seem sickly, so I like to add in a nice flush of color. Choose a really natural shade, I wouldn’t suggest a suggestive blush like NARS orgasm…yeahh…no. Go with something neutral and that looks natural.

I’m using Mood Exposure from the new Hourglass Ambient Lighting Blush palette (review coming soon this week, huzzah). With a light hand I sweep it from the apples of my cheeks to the side of my face.

Interview.Still007Step 5: Is really optional, I wouldn’t suggest heavy contouring but maybe some light “natural” contouring. You don’t want stage make up here, ladies.

I’m using NARS laguna, and I just sweep it under my cheek bones lightly and around my face.

Interview.Still009

Step 6: Tightlining, What tightlining your eyes really is, is going over the spaces between your lashes with a eyeliner, or in my case gel eyeliner, to make your lashes seem fuller. It’s a super natural technique so it’s very usable for interview make up. I even slightly winged it out from my lash line to make my eyes seem bigger.

I’m using Sephora’s Gel Eyeliner in Brown. Remembering natural no make up make up!

Interview.Still010 Step 7: Is again optional. So If you don’t have time really, skip it. Curling your eyelashes + mascara, shouldn’t be really really important.

I’m using Benefit’s They’re Real! Mascara, remembering you’re not here on a date, but here to make a good first impression for your LIFEEEEEE…..So kind of like a date but more serious, we’re not trying to flirt our way up in life, show your skills…err you know book wise.

Interview.Still012

Step 9: Is the last step, to use a natural MYLBB (my lips but better) lipstick, or you can stick to your chapstick, whatever floats your boat. I just like to have my lips a even coverage. Completing my look, yeah?

I’m using NYX’s soft matte lip creme in Amsterdam.

And ta da! You’re Finished!

Interview.Still014Finally some tips from me, a asian girl, to help you with your interviews.

A. Don’t wear crazy nail polish (like myself in the video)

B. Be confident about yourself, I’m not talking overconfidence, but you know…confident in yourself, you already got the interview! They’re impressed with paper you, you just have to impress them with you-you.

C. Lastly, don’t panic. Cold sweats meh, keep calm and zen.

D. Good luck everyone!

loldontpanic

xoxo

Follow me on Twitter or Instagram for more updates.


Review: Faith in Face Truly Waterly Cleansing Water

Hello everyone! I’m back again after my 1 month-ish hiatus, I’ve been traveling ( west coast, So Cal to be specific yayay!) Look forward to a brief video on my travels and snipbits of what my cali life was like in future posts.

But for now that I’m back and here to review one of the more awesome-er products that I got in my new BNTbeauty box!

SAMSUNG CSC

I’ll be reviewing Truly Waterly Cleansing Water by Faith in Face a Korean company that was established in 2009 and focuses on more natural beauty. A brand better known for their amazing facial masks!

Their pink and retro packaging immediately caught my eye because of their similarity to the UK brand, Soap and Glory. But what really impressed me wasn’t their cute packaging but the actual product itself.

It’s a toner AND a make up remover that claimed to even remove waterproof make up. As a lazy girl 50% of the time I love the idea of the 2-in-1 product and I was ready to put it to the test.

In the photos I’m wearing:

  • Stila’s – Stay All Day Waterproof liquid Eyeliner (personal favorite for all day stay with zero smudging)
  • The Balm’s – Nudetude palette for a soft brown smokey eye
  • Benefit’s – They’re Real! Mascara
  • Laura Mercier’s – Caviar Stick in Seashell

So for my test I’m wearing a pretty solid everyday eye look featuring one of the best if not the best waterproof, smudge-proof eyeliners I’ve ever used. Let the testing begin.

Needless to really say, I’m very VERY impressed with this product. SO PLEASED.

The 2-in-1 product removed all my eye make up without smudging, irritation, and without any effort. I’m a convert.

It has a light scent, very faint and is as the bottle says, watery. Perfect refreshing non-greasy after feel.

I used to regularly use Lancome’s Bi-Facil Eye Make Up Remover (4.2oz, $28) because I couldn’t use anything else to get rid of all my more stubborn make up but now Faith in Face’s Truly Waterly Cleansing Water has completely changed my daily cleansing routine.

It has made my routine faster (yay, 2-in-1 products!), and as a bonus, cheaper. Which is nice.


I’m giving this product a 10/10 on the Doris scale.

I wholeheartedly recommend this to anyone looking for a new cleanser.

You can find this magical product on Yesstyle for $17.90 (10.14oz).


This product was given to me to review as a BNTgirl but has a 100% my thoughts in it ❤

Check out the other BNT Girls: Joanne, Kine, Carina, Bella.

Follow me on Twitter or Instagram for more updates.

bntgirls badge


YSL – baby doll KISS & BLUSH in Orange Fougueux (04)

Alo alo bonjour guys.Welcome back, I’ve been on a bit of a break, LIKE A THIRTEEN DAY BREAK SINCE MY LAST POST OMGGGG.

Yeah, I was a bit pooped out after just doing posts every other day so I decided to take a mini breather. Anywhoo I’m back now and soon, I’ll be doing another youtube tutorial, because I got a new camera to play with. GOTTA TEST THIS BABY OUT.

Anyways….

Today I’ll be excitedly reviewing YSL’s baby doll KISS&BLUSH lip/cheek stain. YAY ORANGE SUMMER COLORS and SUPER YAY TWO IN ONE MAKE UP ITEMS.
SAMSUNG CSC
side2

As you can see it’s a cute super cute orange shade perfect for summer.

P1170240

It features a doe tipped brush making it easy to apply overall, as the tip is great for outlining/fine details and the fatter part of the brush it perfect for fast applying.

Unlike some cheek and lip products which are only good for one or the other, I can proudly say I love using this on my cheeks too! Although it took 2-3 tries my first time, I got used to applying the “right” amount giving myself a great cheek glow. I’ll do a quick and easy tutorial soon (on blushes in general)!

side

Oh baby, that moment when you apply just the right amount of blush and on the right area of the cheek. MY CHEEKS LOOK SUPER CONTOURED WITHOUT CONTOURING YEAAAAA!

MY EYELINER IS SO THIN YEAAAAA! Yeah, sorry guys I’m only this excited because you’re the only ones who will see this, I didn’t go out that day when my make up was almost perfect.

PROS:

  • beautiful color
  • easy to apply
  • smells good (peachy scent)

CONS:

  • does not last all day (bummers, but I keep it in my bag!)
  • really easy to apply too much to the cheeks (I suggest using natural lighting, DONT PUT THIS ON IN A DARK ROOM)
  • it’s $40 (but if it makes you feel better it’s a LIP and CHEEK product! *chants * 2-in-1!)

Overall I’d give this product a 9.5/10. I really wanted a orange lip/cheek color this summer and this satisfies me so much. SO MUCH. I’m going to buy a few more shades.

I’ll see you guys soon, thanks for reading. ❤


face2

My skin care routine plus some tips (◕w◕ア

Alrighty so I’m just going to do a mini post on my skin care routine/ my skin care tips because I’ve been recently doing a lot of skin care posts. I figured I might as well show my readers what I do usually on a every day basis (minus the mask, I do that once a week or before a special occasion SUCH AS A DATE IF I HAD ONE.)

  1. Eyes – Lancome Bi-Facial Eye Make up Remover (everyday when I wear mascara)
  2. Makeup – Biore daily deep pore cleansing wipes (extra bonus: FOR DEM PORES, everyday if I wear make up)
  3. Scrub – MBD Egg White Gommage peeling (2-3 time a week)
  4. Mask – Leaders Aquaringer Skin Clinic Mask (once a week)
  5. Serum – iSOi – Bulgarian Rose Blemish Serum (morning and night)
  6. Cream – BRTC Aqua Rush Cream (morning and night)
  7. Diet – EAT HEALTHY FOR BETTER SKIN (every moment of your life)
  8. SLEEEEEEEEEEEEEPPPPPPPPPPPPPPPPPPP (try to get 8, I try for 10 hours in the summer #yolo)

I find that for the easiest removal of the toughest make up i.e eyeliner/mascara is easiest with a dual liquid type eye make up remover (meaning that when it’s undisturbed you’ll see two layers of liquids in the container) it removes eye make up gently and without any harshness. The reason why I don’t just use my make up wipe to do my entire face is because it never gets ALL of my eye make up off and the skin around the eyes are more sensitive.

For scrubs and masks, I wouldn’t say they’re absolutely vital to a skin care routine but you know they’re nice to have on the side. Sort of like fries, fries are always nice to have on the side. JK I NEED FRIES. Scrubs/masks are a added bonus, think “treat yo self” and I think it’s pretty much like a spa day in your own home.

Serums are also a treat yo self skin every day kind of thing. So also nice to have but not really a necessity unless you have a skin care problem which is treated by a serum.

Creams are vital. How vital you may ask, well they’re like how much I need ice cream in the summer. Constant cravings. Creams help me fight against my constant random dry patches and let me go through the day/night knowing my skin is kept moisturized!

Though to be real, I’d put an emphasis on the last two mostly, a healthy diet and sleep can do wonders on your skin. I know personally when I’m back in the student grind I lose my shiny egg white like skin because of a diet of apple crisps + fries and like 3-5 hours of sleep.  But you know if you don’t have good skin, you can always fake it with concealer or take extra care of your skin with eye creams, and creams in general. Heavy usage on conceal if necessary.

When I’m really lazy all I need is some concealer under the egg bags and then some brows and my go to “whatever” look is complete. tl;dr eyemake up remover + cream + sleep + food =  awesome skin everything to me seems like a extra bonus Thanks for reading, see you guys again soon! YSL baby doll kiss + blush first impressions soon! ❤